Any updates on this project? I'm still looking at Blazers on craigslist, but not buying anything.
2002 330Ci & 2020 Tacoma
Well, after over thinking this inner structure piece for almost 2 years, I finally said "F it," and got to work.
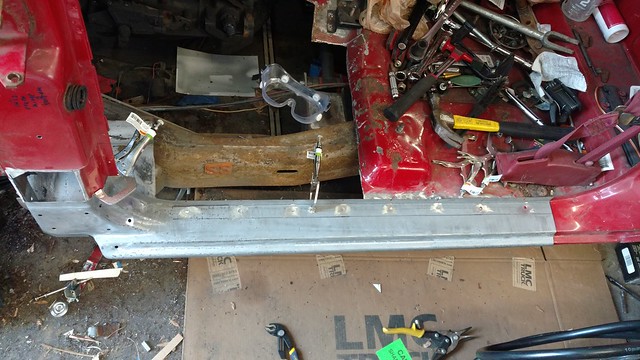
I went out to the truck and found pieces of the old, rusty rocker. From there I looked at the clean area and determined the approximate shape I needed.
IMG_20190327_152832314 by , on Flickr
You can see that it looks like the panel ended about halfway through the curve.
So, that's where I cut my original rocker replacement. I had messed up a little at the back and the gap was too big to weld up, so I used that as my base, and then used my 2nd, untouched rocker for it's intended purpose.
I cut it at the line closer to the front.
IMG_20190327_133050238 by , on Flickr
Voila! I used a punch I bought probably almost 20 years ago (for VW floors) to punch holes. My intent had been to weld the two pieces together, with the holes on the back side so I wouldn't have to smooth spot welds...but changed my mind.
Didn't end up having to section it, fortunately.
IMG_20190327_140746178_HDR by , on Flickr
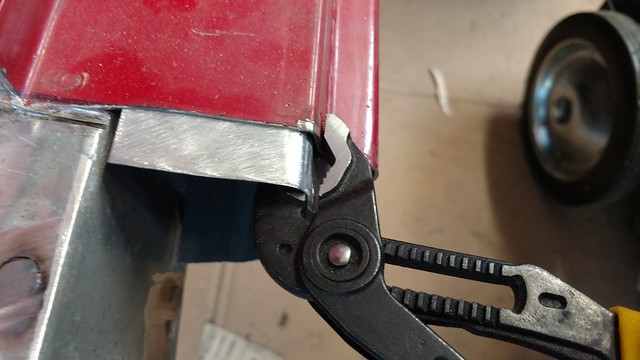
Refit the outer rocker and clamped everything in place before marking it this time.
IMG_20190327_170201446 by , on Flickr
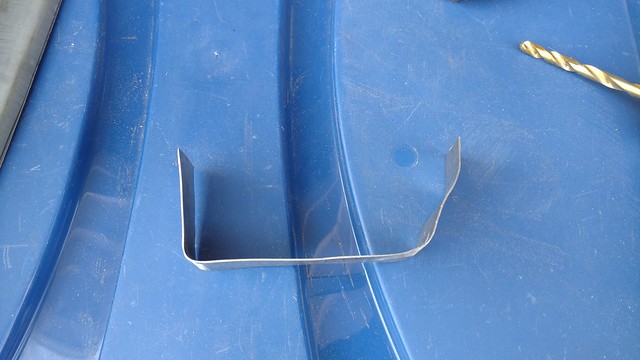
Then I made some backers to fill some gaps.
IMG_20190327_172832256 by , on Flickr
IMG_20190327_173500496 by , on Flickr
IMG_20190327_155256592 by , on Flickr
The back side of everything got hit with weld through primer, and is drying.
I need to cut the extra 3 or so inches out of the factory rocker, and prep the surface of the rocker where I replaced the back piece, and I should be ready to weld things on.
After that I can proceed with the inside kick panel, bottom of the fender and floor.
Might be a while, I have some other things going on, but shouldn't be 2 years.
Jay
The "Other Things" include getting ready for Jason's meet in May. lol
If you're looking for Blazers, don't read these threads:
https://www.pro-touring.com/threads/...orever-project
or
https://www.pro-touring.com/threads/...-89-S10-Blazer
and don't look at Holley's website regarding their "kits" for LS swapping them. lol
Could get expensive.
Jay
So, I figured out how I'm doing this.
Clamped the rocker in place, and lined things up.
Welded in the backer panel for the hinge. (First layer...another layer to go)
Next will be the inner kick panel then the rocker will go on.
IMG_20190407_215548659 by , on Flickr
Jay
Wow, I have this on like 3 different forums, and I'm not up to date on any of them. lol
Bringing things up to date:
IMG_20190414_190057628 by Jay McGraw, on Flickr
IMG_20190414_225314169 by Jay McGraw, on Flickr
IMG_20190414_225320336 by Jay McGraw, on Flickr
IMG_20190415_215239042 by Jay McGraw, on Flickr
IMG_20190415_215242895 by Jay McGraw, on Flickr
IMG_20190416_203537503 by Jay McGraw, on Flickr
But the rocker seems to be out a little (1/4" or less) at the front of the door, so I need to pull it in to make the door fit right before I install the floor.
Sadly, with winter being what it has, I have a bunch of stuff shoved in the garage and don't have much room to work. I plan to pick it back up in spring once
we get 50ish temps on the regular.
Also, I purchased the "Distraction from the Distraction," a '99 Plymouth Neon Expresso Coupe Manual in Forest Green.
I picked it up so I could keep the Mazda cleaner, and keep the miles off of it since I put 100k in 2.5 years.
Typical shows are 200-250 miles away from me, so I needed to tone it down some. lol
Untitled by Jay McGraw, on Flickr
It was originally an automatic, but the PO converted it to a manual. I picked it up for $550 with an Iceman CAI, Mopar Performance PCM, Embroidered "Neon" bra (sorta rare), Mopar High Rates and Extra High rate springs, Koni adjustable struts (which are shot) stock steelies and a set of Rotas. It also came with a full Prothane Urethane bushing kit.
The speedo hadn't worked since about 2006 when he swapped the trans, and the reverse lights didn't work either.
So far, since I've picked it up I've fixed:
Speedo/Odometer
Swapped Springs and struts
Front and rear motor mounts (front is now stock with Prothane inserts, rear is a Neon Goodies Semi Solid mount)
Replaced the exhaust manifold
Cleaned and painted the rusty battery tray, fixed a bunch of wiring issues, swapped to a stock PCM to see if I can get the MPG up.
And collected a lot of parts:
Untitled by Jay McGraw, on Flickr
I've picked up a couple more things since then. Come spring I have a lot of work to do. lol
Jay
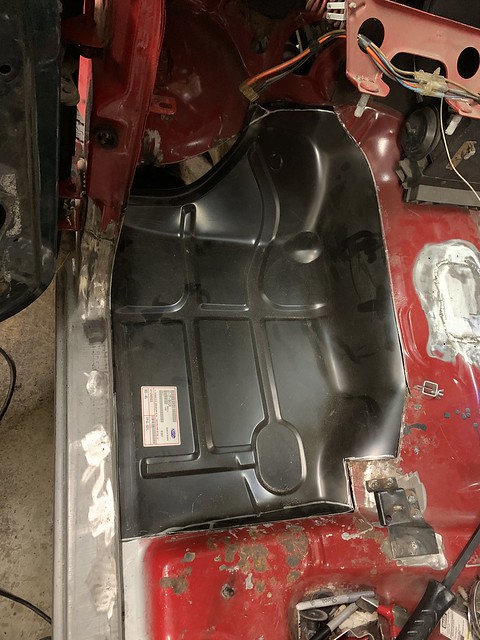
OK. It only took a global pandemic, but my truck now has a floor. I'm going to pretend the other side is fine. lol
I had a hard time getting my welder settings right, so the welds aren't pretty, but hey, it's a floor.
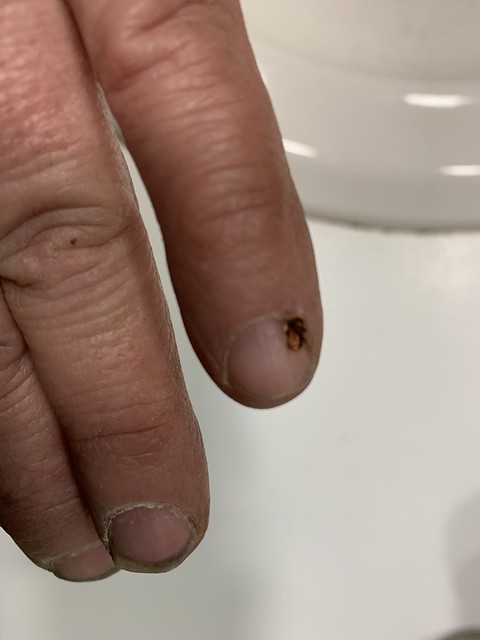
And, while doing some of the welding, I had a ball of weld spatter land on my pinky finger nail and melt part way through my nail. Ouch.
So, yeah, they're ugly (I had some problems at first, and blew through in a few places, but it's solid.) I'm going to hit them with the grinder and cover it in seam sealer. There will be sound deadener and carpet over it, so you can't see it anyway. I'll clean up the under side when I pull the cab for some other stuff.
But overall, I'm happy. I should be able to put the seat, column and pedals in and figure out where to mount my Trailblazer shifter and parking brake handle.
This will probably be a rainy day project for the next few weeks, since I have some other stuff I need to work on.
Jay
Love seeing builds like this. Motivates me to finally find a project car. I want something I can work on with my son when he gets older. He’s only two now but when I put YouTube on the tv he wants to watch cars cars cars. Unfortunately the boy has extremely expensive tastes lol
Sent from my iPhone using Tapatalk
Today, I finished up mounting the on the shifter, and started on the hand brake.
The brackets I made for the shifter kinda floated over the edge because of the shape of the floor, so I made a support that tied it into the floor. I put a speed home in it, too. lol
Didn't get a pic. I'll post one tomorrow after I get the parking brake sorted.
A user on S10forum gave me a parking brake and support bracket he plasma'd out of a parts truck he had. I started by separating the floor from the support bracket.
Then I determined position, which isn't as ideal as I'd like, I had to move it toward the driver's side, so there would be enough room between the passenger seat to build the side of the center console. That just means I might not have room for a convenient cupholder, but I'm still optimistic. lol
I cut the floor for clearance and made templates to extend the tunnel, and give it a little more height so I have clearance for the parking brake cables over the driveshaft.
I'll cut them up and get them in tomorrow. I'm making them out of 16ga, and the factory bracket will attach underneath.
More tomorrow.
Jay
I see I forgot to post my shifter mounts the other day. Oops.
Those got welded in and I made brackets to support the sides that were "floating" because the floor is curved.
Jay