Page 4 of 7 FirstFirst ... 23456 ... LastLast
Results 31 to 40 of 61

Thread: astrochex first ever build - MINI Cooper S

  1. Back To Top    #31

    Re: astrochex first ever build - MINI Cooper S

    If those 2 6X9's are 8 ohms each, the load at the amp will be 4 ohms

  2. Back To Top    #32
    Senior Member astrochex's Avatar
    Real Name
    Paul
    Location
    Space Coast
    Vehicle
    2006 MINI Cooper S Checkmate Edition
    Posts
    932
    Join Date
    Apr 2013

    Re: astrochex first ever build - MINI Cooper S

    I finally got a response from Audiotec-Fischer regarding the Helix minimum wire size issue. They said 16mm2 is roughly 6ga. So trimming is still the plan.

  3. Back To Top    #33
    Senior Member astrochex's Avatar
    Real Name
    Paul
    Location
    Space Coast
    Vehicle
    2006 MINI Cooper S Checkmate Edition
    Posts
    932
    Join Date
    Apr 2013

    Re: astrochex first ever build - MINI Cooper S

    A pseudo update.

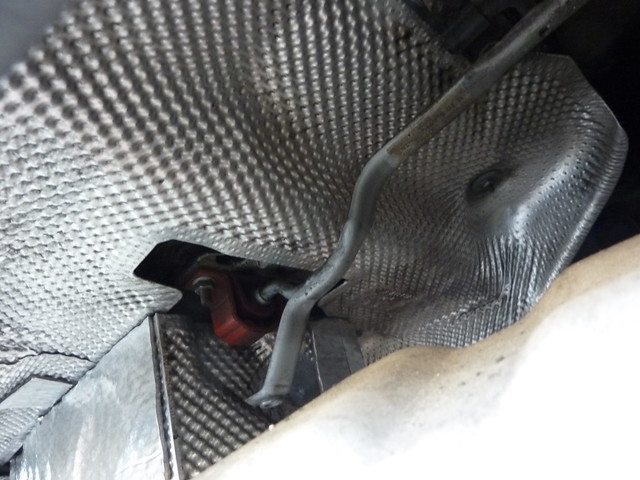
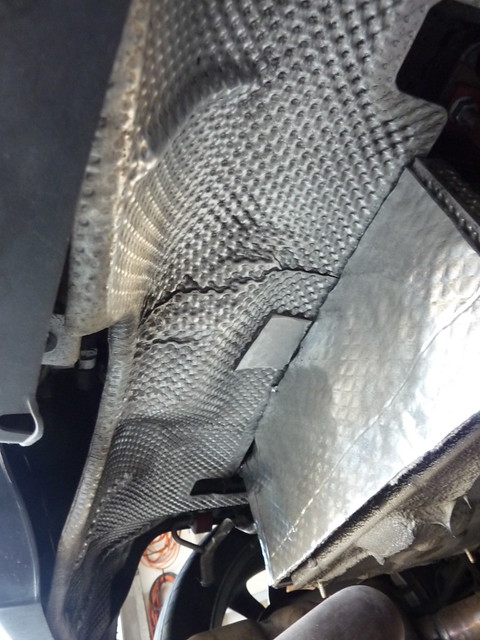
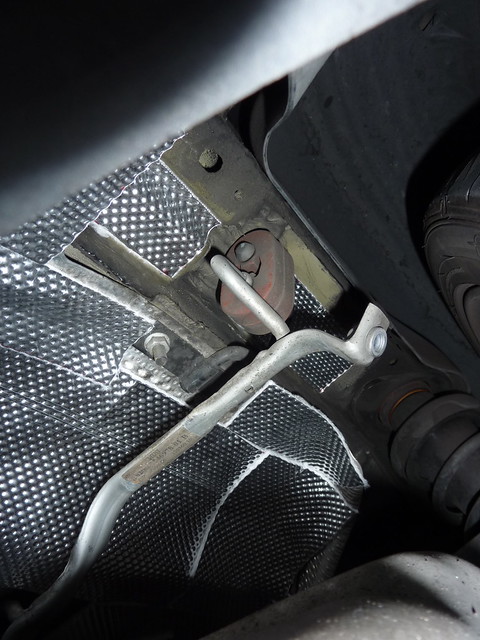
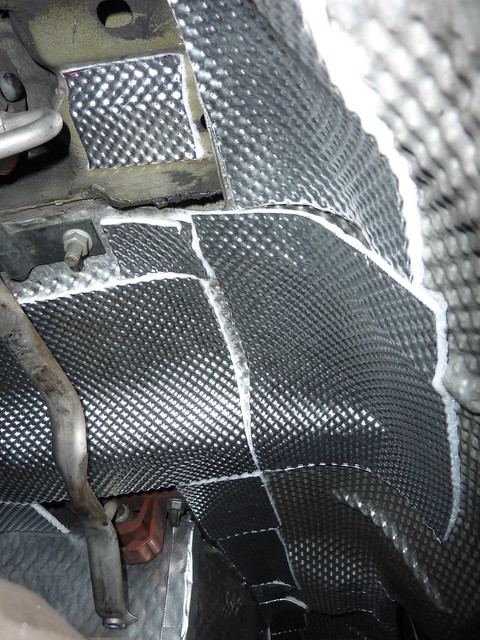
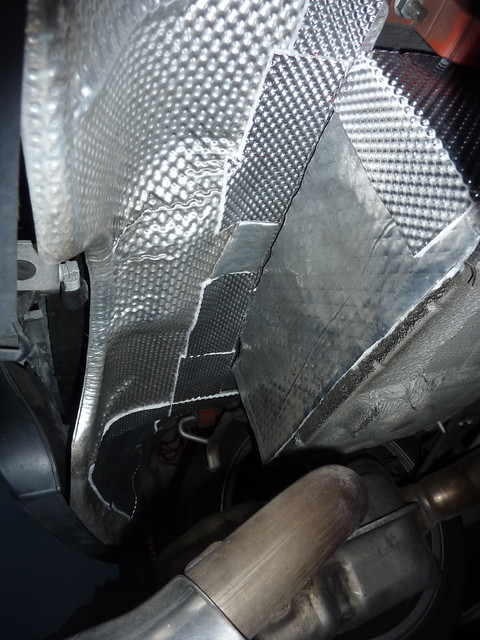
    As I mentioned in post 19 of this build, the R53 boot is subject to high temperatures. This past weekend, I installed the DEI material on most of the exhaust shroud material under the boot. After driving, I have recorded body surface temps in the 90-100+ range, a significant reduction from before. The temps on the top of the carpet in the boot area at about the same as other surfaces in the region. I'm pleased with the results. I have before and after pics, I just need to upload them.

  4. Back To Top    #34
    Senior Member chithead's Avatar
    Real Name
    Daniel
    Location
    Concord,NC
    Vehicle
    We don't talk about it
    Posts
    3,058
    Join Date
    Jul 2013

    Re: astrochex first ever build - MINI Cooper S

    Very nice! I like the precautions you are taking to ensure comfort as well as quiet.
    Are you not entertained?!?!


  5. Back To Top    #35
    Senior Member astrochex's Avatar
    Real Name
    Paul
    Location
    Space Coast
    Vehicle
    2006 MINI Cooper S Checkmate Edition
    Posts
    932
    Join Date
    Apr 2013

    Re: astrochex first ever build - MINI Cooper S

    Pictures to complement my pseudo-update.

    I had to drop the exhaust so I could access all areas of the heat shield.

    The material I used is DEI Floor and Tunnel Shield. It withstands up to 1750°F of direct continuous heat and the adhesive side holds past 450°F.


    Right side of the heat shield before material. The battery box is in the center. It already has similar material applied.


    Forward of the battery box before material.


    Aft of the battery box before material.


    Right side of the heat shield after material. Small pieces is the theme to adhere to the contours. It took a while to complete.


    Forward of the battery box after material, looking from the right side.


    Aft of the battery box after material. I only covered the area beneath the trunk area. Further back is bumper and I did not think adding material would help. I may still add material since there is still shield that can heat up.

  6. Back To Top    #36
    Noob papasin's Avatar
    Real Name
    Richard
    Location
    Cupertino, California, United States
    Posts
    111
    Join Date
    Jun 2013

    Re: astrochex first ever build - MINI Cooper S

    Nice progress Paul!

  7. Back To Top    #37
    RRAMA NEED $$ TIMMAY!!!'s Avatar
    Real Name
    Tim
    Location
    CT
    Vehicle
    1993 Dodge Dakota, 2003 Subaru Outback
    Posts
    309
    Join Date
    Apr 2013

    Re: astrochex first ever build - MINI Cooper S

    Lookin good!
    Please leave your comments in the box outside my door, right underneath the sign that reads: Shame T. Llama, phD. Your thoughts are very important to me!

  8. Back To Top    #38
    Senior Member astrochex's Avatar
    Real Name
    Paul
    Location
    Space Coast
    Vehicle
    2006 MINI Cooper S Checkmate Edition
    Posts
    932
    Join Date
    Apr 2013

    Re: astrochex first ever build - MINI Cooper S

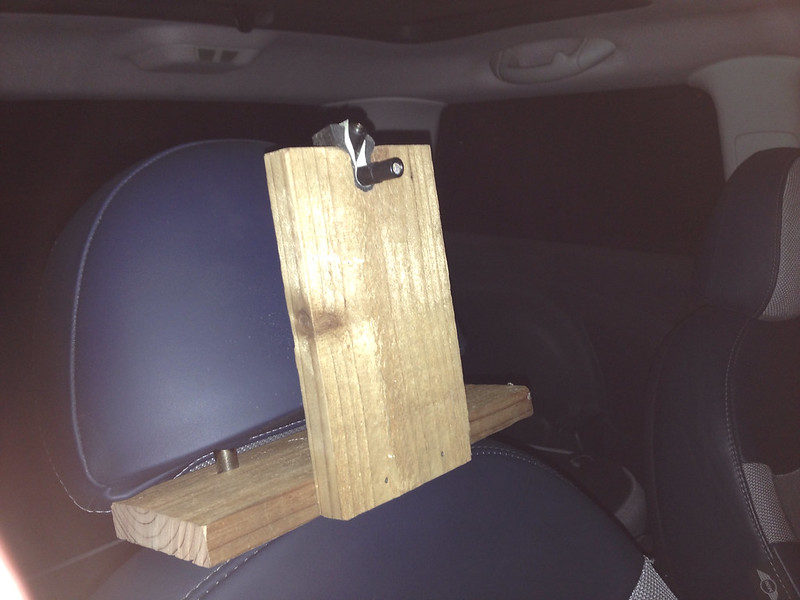
    High tech alert, behold, my RTA rig! The mic position is roughy me in the passenger seat. The headrest is in backwards to clear the microphone.
    software - RTA from Studio Six Digital
    hardware - iphone5
    mic - Dayton Audio iMM-6 Calibrated Measurement Microphone
    mic stand - wood scraps + weatherstrip foam + headrest attachment points


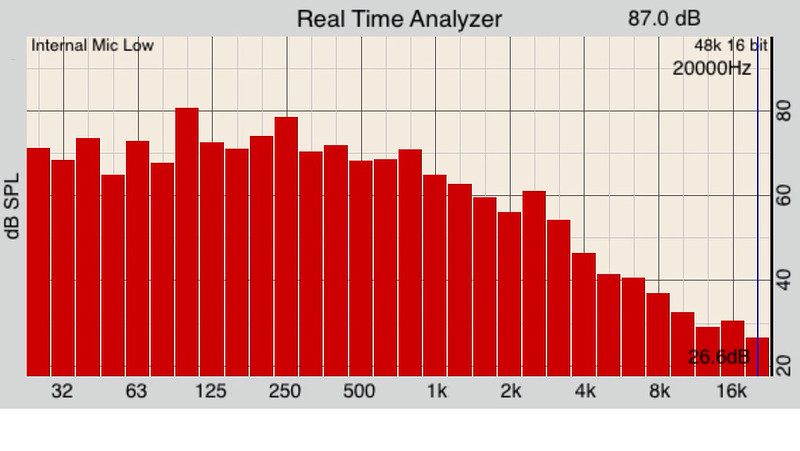
    Typical road noise measurement.
    I have no idea how this compares to other cars, but I am guessing its high. Note that the tires are worn and that the rear seats are down which adds cabin noise. I wanted to measure a baseline to get an idea how effective the remaining deadening will be.


  9. Back To Top    #39
    Owner BigAl205's Avatar
    Real Name
    Alan
    Location
    Hayden, AL
    Vehicle
    2018 Chevy Silverado Z-71
    Posts
    5,701
    Join Date
    Feb 2013

    Re: astrochex first ever build - MINI Cooper S

    That's ghetto-fabulous!

  10. Back To Top    #40

    Re: astrochex first ever build - MINI Cooper S

    Cool rig!

    I hope you're not planning on using it for real RTA though.
    Nick

Posting Permissions

  • You may not post new threads
  • You may not post replies
  • You may not post attachments
  • You may not edit your posts
  •  
Back To Top