Page 7 of 7 FirstFirst ... 567
Results 61 to 67 of 67

Thread: The Victim Build Thread -- Featuring frame replacement

  1. Back To Top    #61
    RRAMA NEED $$ TIMMAY!!!'s Avatar
    Real Name
    Tim
    Location
    CT
    Vehicle
    1993 Dodge Dakota, 2003 Subaru Outback
    Posts
    289
    Join Date
    Apr 2013

    Re: The Victim Build Thread -- Featuring frame replacement

    Quote Originally Posted by benny View Post
    Looking good, titbug. And anybody can be a good welder with a grinder and a can of paint.
    Haha! I sure don't claim to be a good welder. But this was a great place to practice because the only force on this part will be basically straight up. There's basically no chance of failure...but supposing it DID fail, it's not even an essential part...so no lives at risk!
    Please leave your comments in the box outside my door, right underneath the sign that reads: Shame T. Llama, phD. Your thoughts are very important to me!

  2. Back To Top    #62
    Disturbing the peace SublimeZ's Avatar
    Real Name
    James
    Location
    Deepinthehearta, TX
    Vehicle
    2024 Trailblazer RS
    Posts
    2,048
    Join Date
    Feb 2013

    Re: The Victim Build Thread -- Featuring frame replacement

    Nice work Tim. I'm impressed that you have stuck with this.


  3. Back To Top    #63
    RRAMA NEED $$ TIMMAY!!!'s Avatar
    Real Name
    Tim
    Location
    CT
    Vehicle
    1993 Dodge Dakota, 2003 Subaru Outback
    Posts
    289
    Join Date
    Apr 2013

    Re: The Victim Build Thread -- Featuring frame replacement

    ^ James, honestly so am I. It doesn't take much to make me frustrated so this project is a lesson in patience/determination.

    Why You Shouldn't Ignore A Whirring Throwout Bearing

    Before I started this project, when I was still driving the truck as unsafe as it was, it was having a stalling issue when the clutch was depressed. If I didn't shift quick enough or tap the gas, it wouldn't stay running. It idled perfectly in neutral; only immediately after the clutch was depressed would it stall. I figured it was some vacuum issue, but never bothered to look into it. I secretly hoped that after I was done with the rebuild, it would magically go away (even though the engine is not part of the rebuild).

    As it turns out, the cause may not have been a vacuum issue at all, but a clutch issue. The throwout bearing was whirring loud ever since I got the truck, but it may have been worse than I thought.

    What a bad throwout (release) bearing sounds like - YouTube

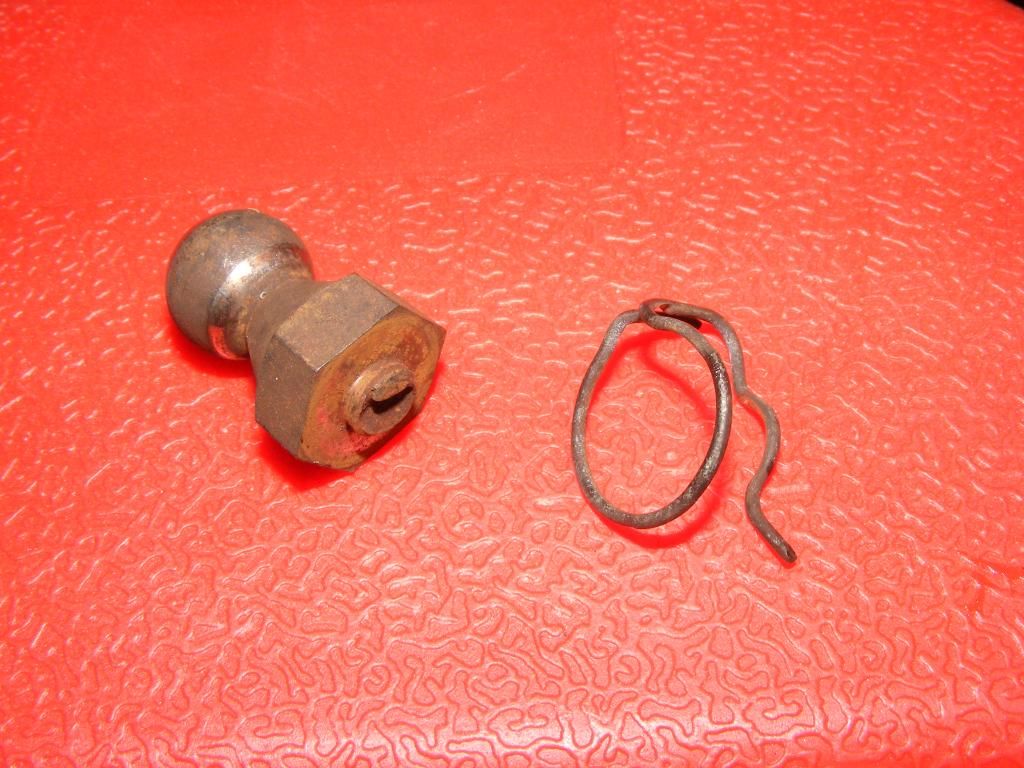
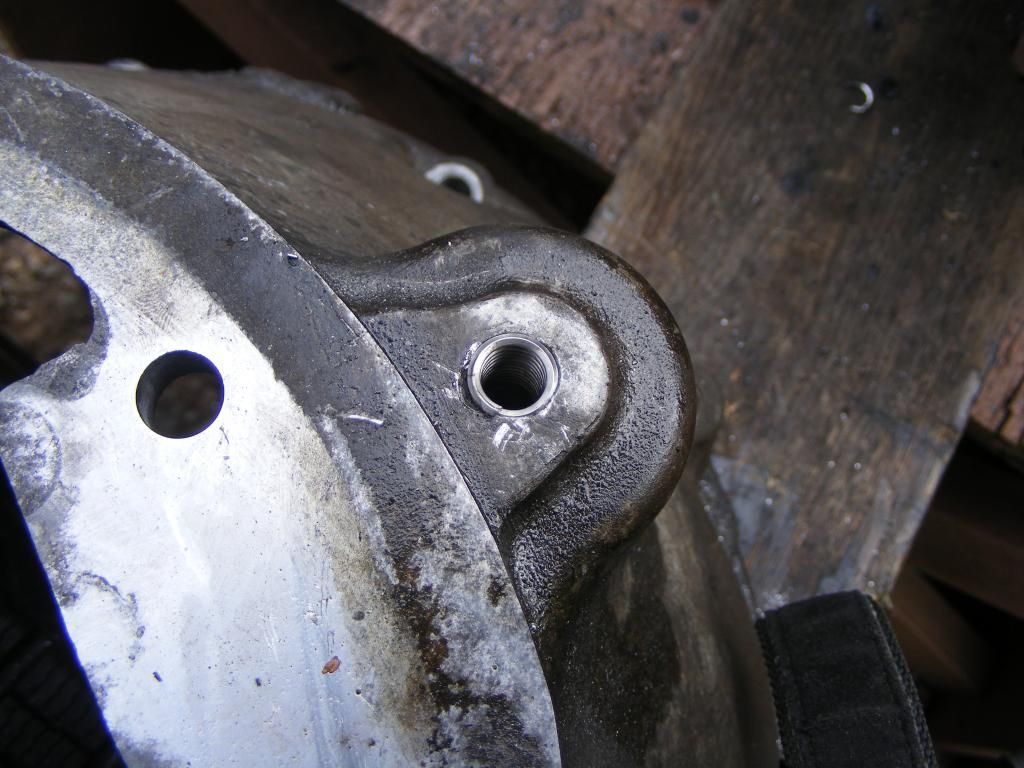
    That's the condition of the throwout bearing. There was another problem though. The pivot ball on the opposite (passenger's) side of the clutch fork was broken clean off at the start of the threads. Not only that, but the aluminum surface where the pivot ball sits was actually DENTED significantly as the pivot ball washer appears to have been driven into the aluminum. It would have taken no small amount of force to do this kind of damage. The only explanation that I can think of is that the throwout bearing was actually seizing up every time the clutch was depressed, causing the clutch fork to put a lot of force on the pivot ball. First it bent and drove the washer into the aluminum, then it broke. I guess I was driving it like this.

    A picture of the broken pivot ball and retainer spring.


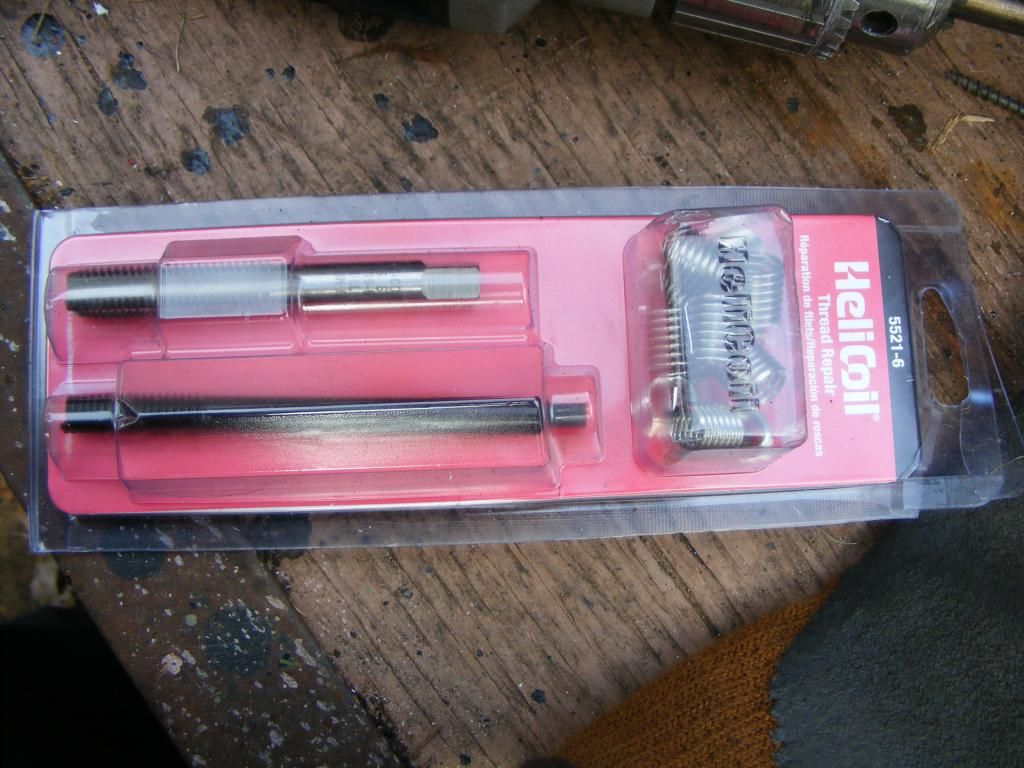
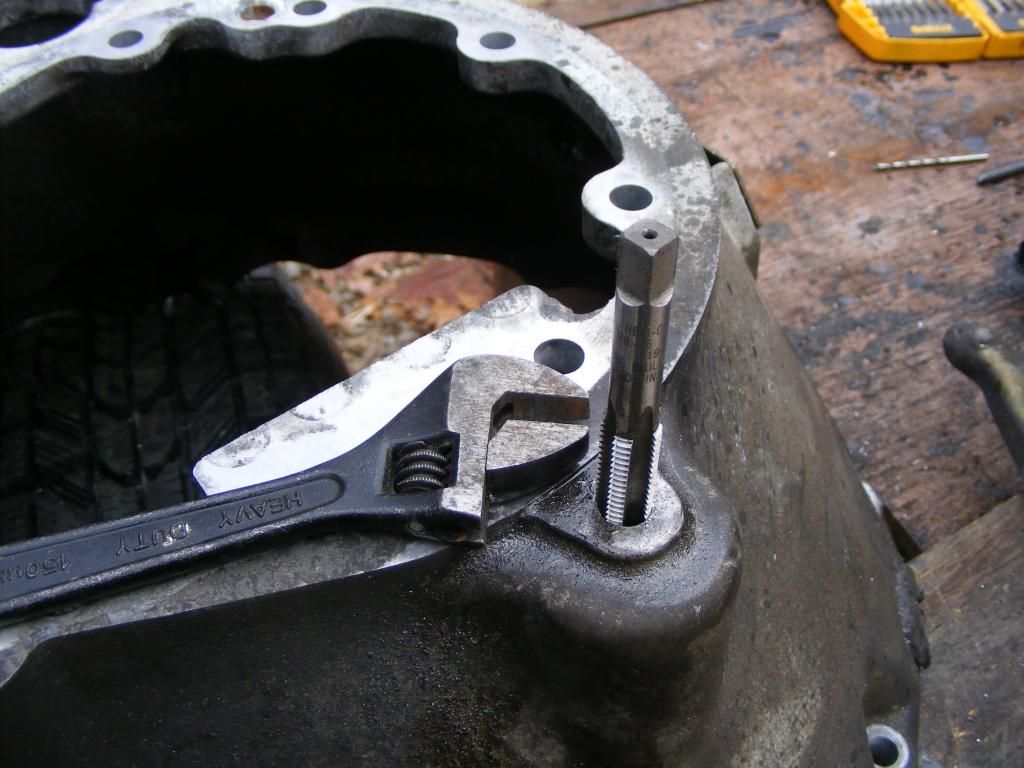
    So the solution was to drill out the broken pivot ball threads, helicoil them, and install a new pivot ball. First I removed the bell housing so I could work on the thing from both sides (the pivot ball hole is threaded all the way through the bellhousing), then started drilling. This was easier said than done, probably because I first tried welding a nut to the slightly protruding threads and then I had to drill through some of my weld. I killed many drill bits in this process, but finally got it. The hole is ever so slightly crooked, but the clutch fork has plenty of side-to-side play to account for it. If I were to do it again I probably would have a machine shop do it so it was straight...who am I kidding...I'd do it the wrong way again...


    The pivot ball I bought was part # 52087542 MOPAR and I bought it here: Clutch Fork Pivot Mopar 52087542 | eBay

    The helicoil kit is a 3/8"-16.


    It's much easier to tap from the back side.


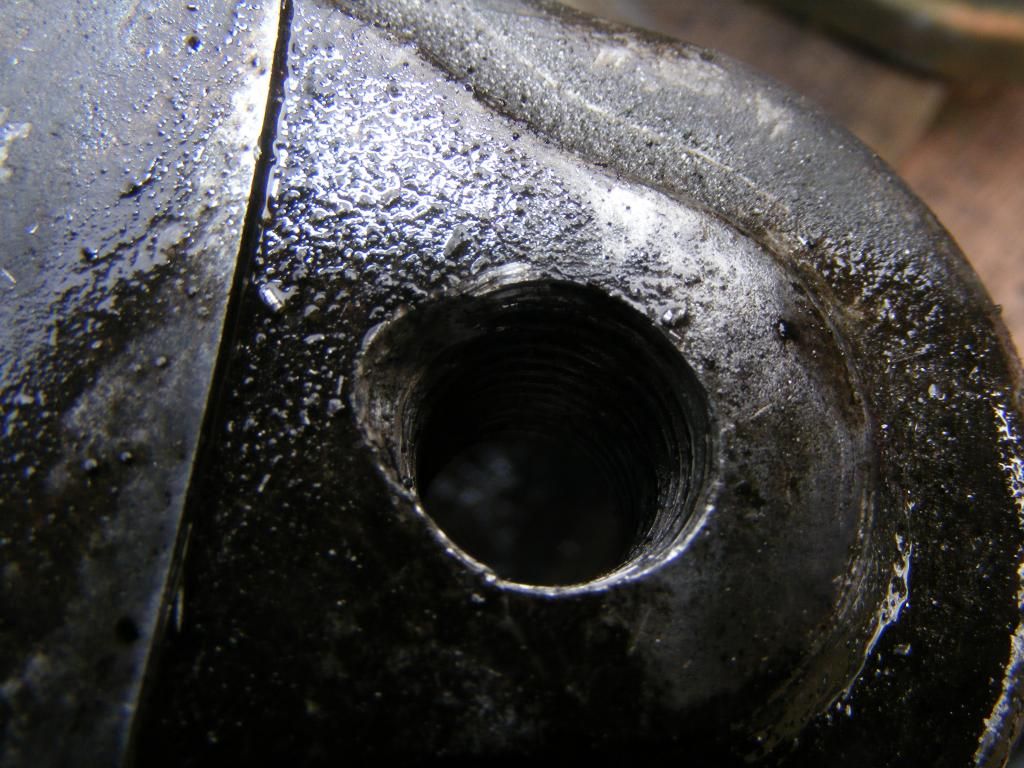
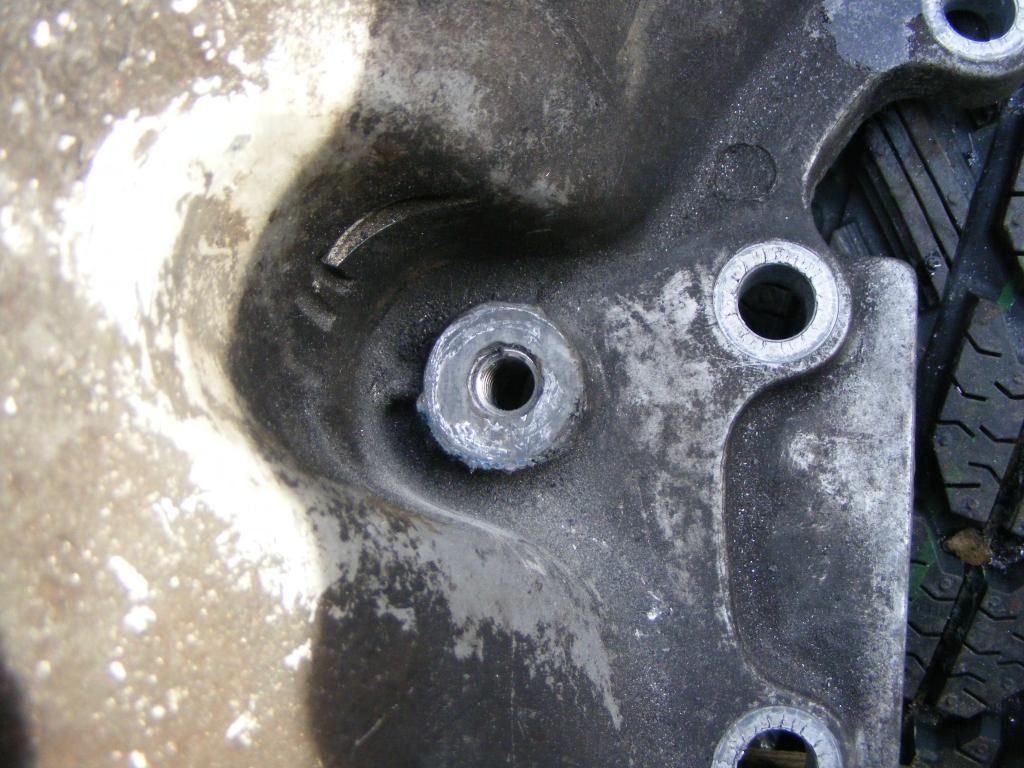
    I ended up actually using two helicoils stacked so that I could get the full thread length, which worked just fine. In all likelihood it would have worked fine with one.


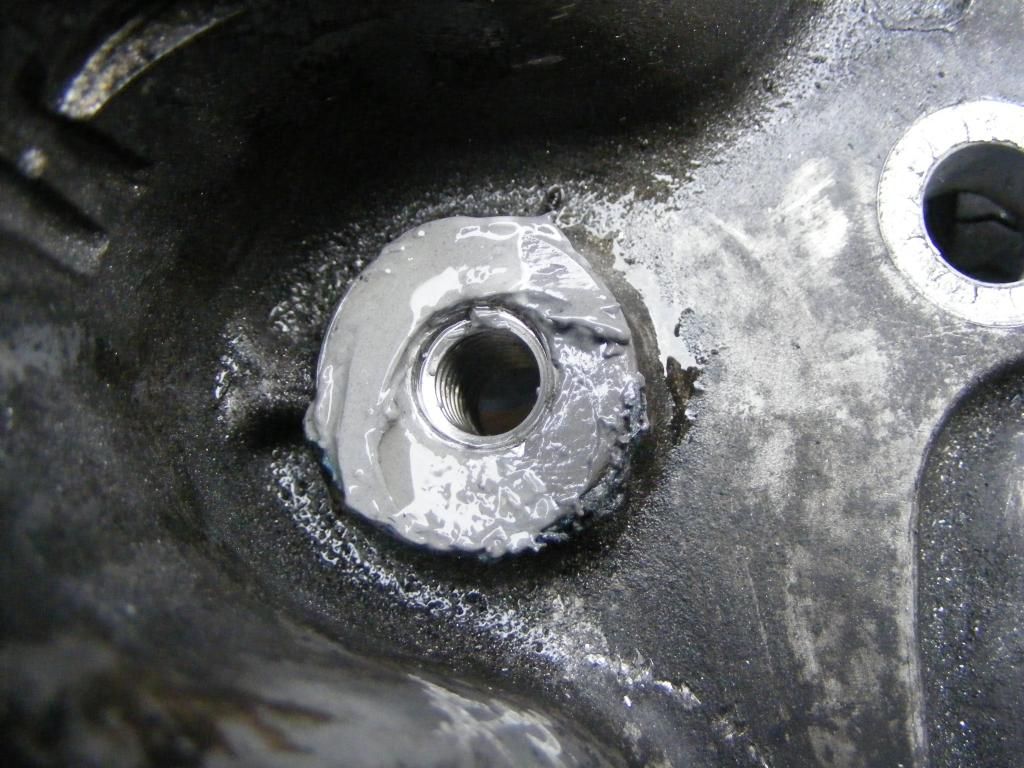
    Then, I filled in the divot in the aluminum with JB Weld and used a grinder on a Dremel to smooth it down. I reused the washer because it seemed perfectly fine.

    Please leave your comments in the box outside my door, right underneath the sign that reads: Shame T. Llama, phD. Your thoughts are very important to me!

  4. Back To Top    #64
    RRAMA NEED $$ TIMMAY!!!'s Avatar
    Real Name
    Tim
    Location
    CT
    Vehicle
    1993 Dodge Dakota, 2003 Subaru Outback
    Posts
    289
    Join Date
    Apr 2013

    Re: The Victim Build Thread -- Featuring frame replacement

    Continued....

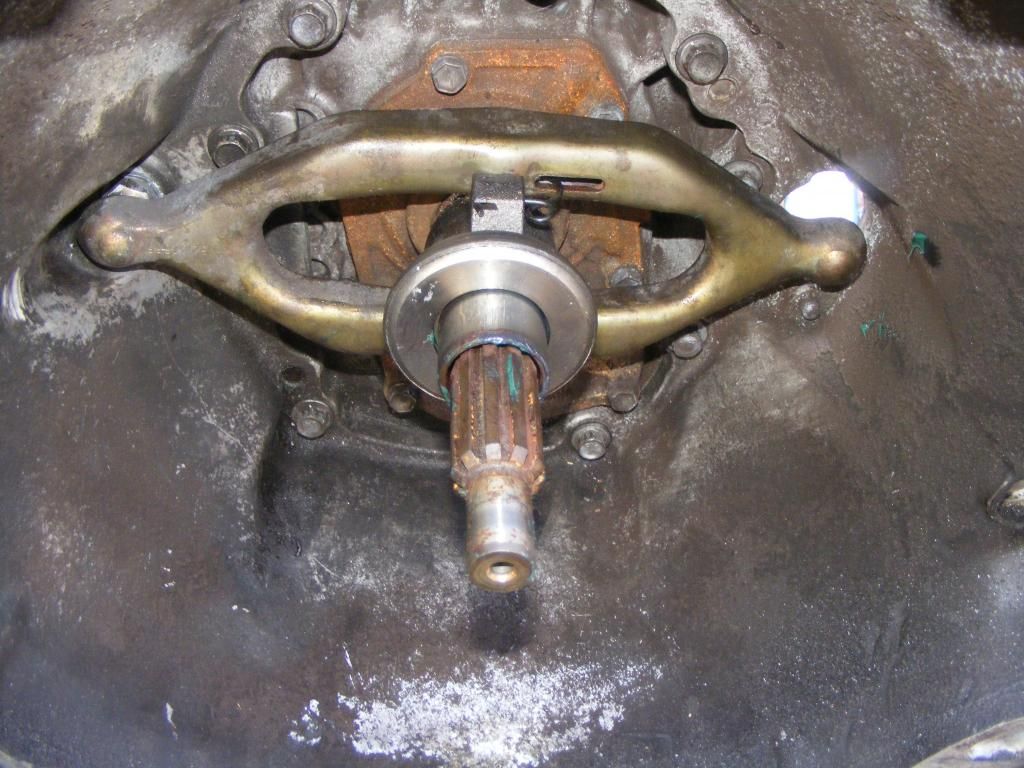
    Note that the (dark gray) JB Weld is mostly on the left side...this is where the divot was.


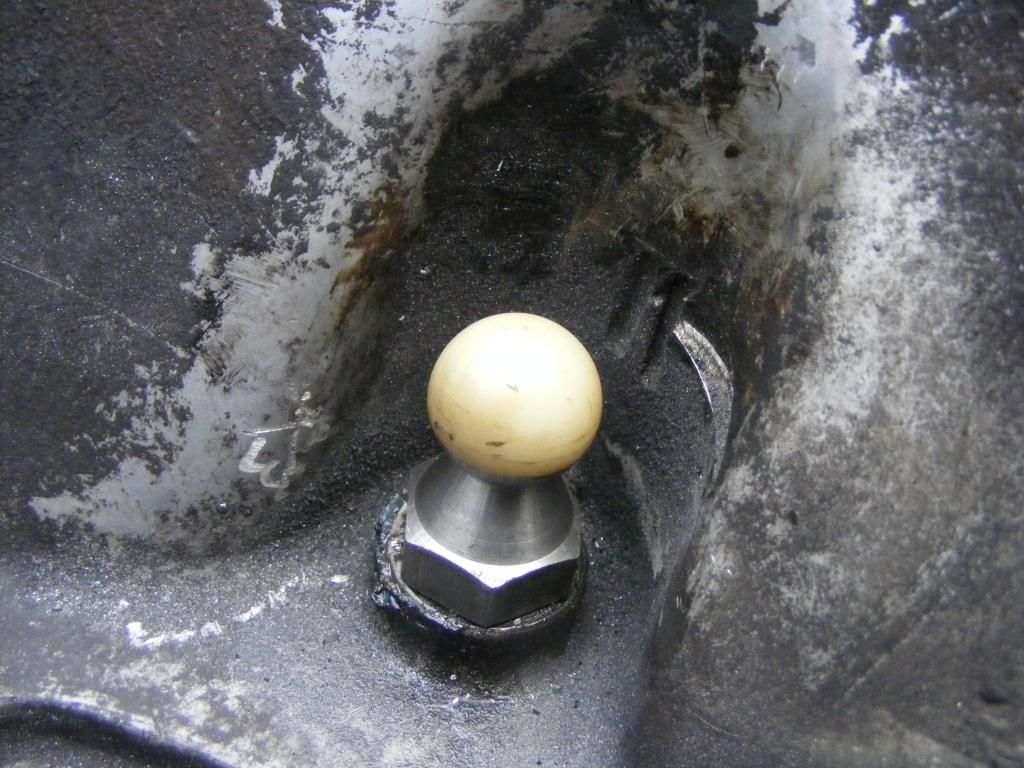
    All done...Oh yeah there is the retainer spring not pictured which was also broken. Mopar Part # 04338855. I bought that here: http://www.factorychryslerparts.com/.../04338855.html Shipping was ridiculous for such a small part...but I needed it.


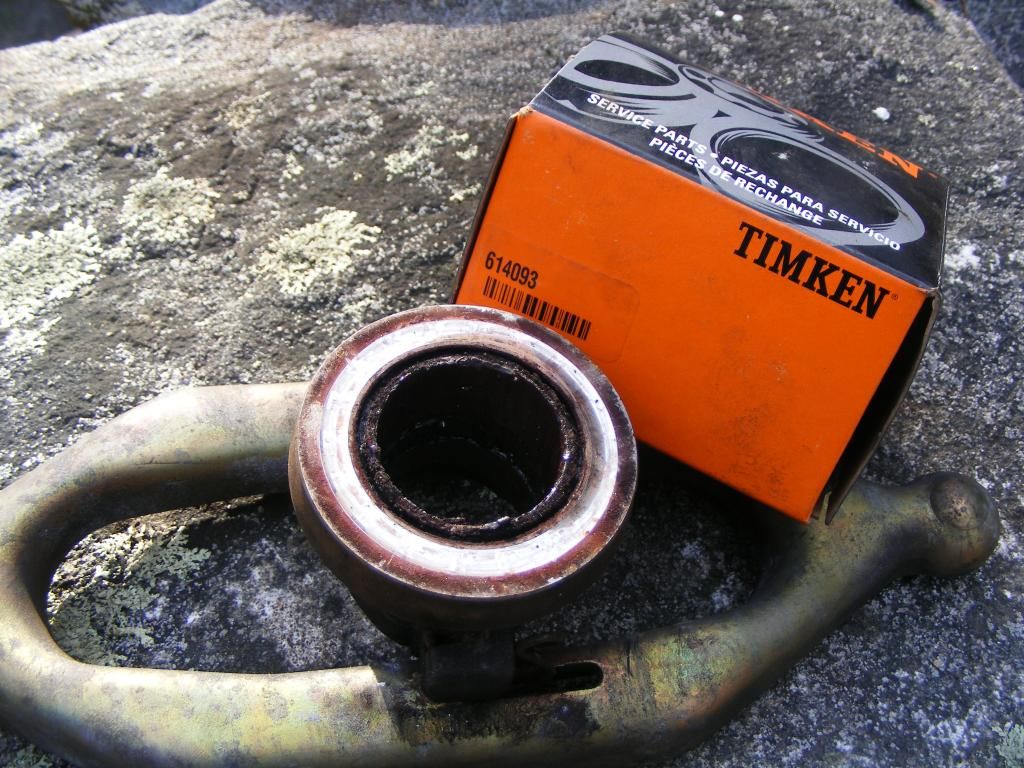
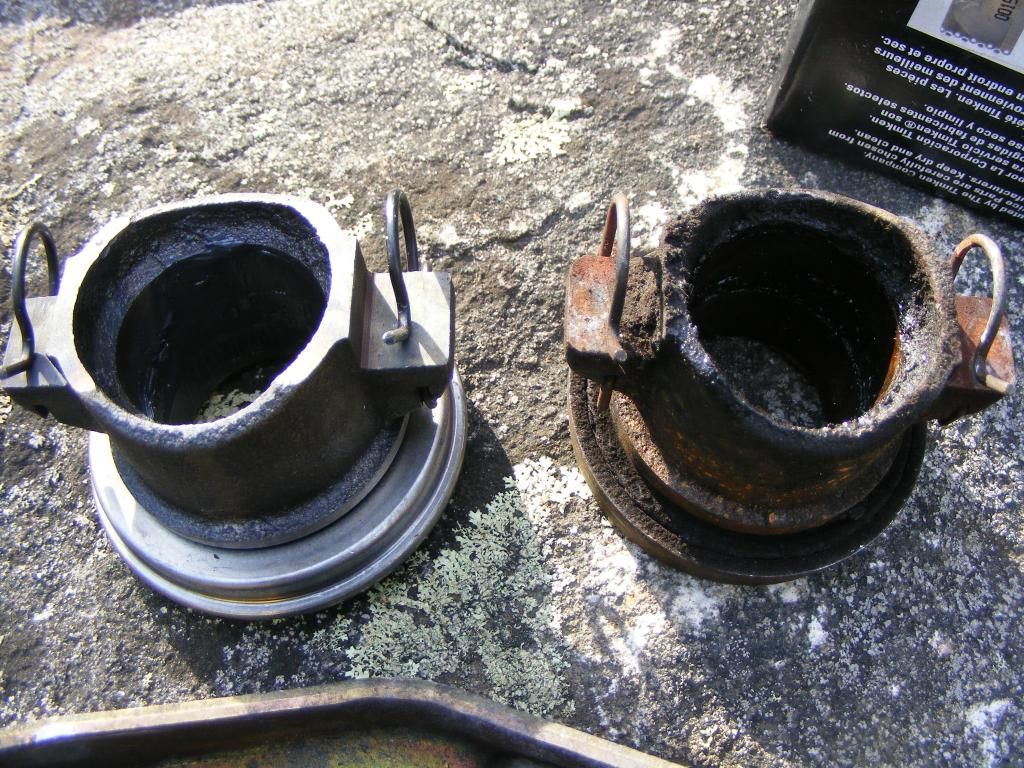
    Then I replaced the throwout bearing itself with a Timken unit (part # 614093). What a beautiful difference.

    Bad


    Good/Bad


    I cleaned and greased the throwout bearing slide surface well, and I used brake caliper grease on the pivot ball.


    What a load off to get this thing done. I didn't immediately think about it being related to the stalling issue, but now I do expect this to solve the clutch-in stalling issue.

    Please leave your comments in the box outside my door, right underneath the sign that reads: Shame T. Llama, phD. Your thoughts are very important to me!

  5. Back To Top    #65
    RRAMA NEED $$ TIMMAY!!!'s Avatar
    Real Name
    Tim
    Location
    CT
    Vehicle
    1993 Dodge Dakota, 2003 Subaru Outback
    Posts
    289
    Join Date
    Apr 2013

    Re: The Victim Build Thread -- Featuring frame replacement

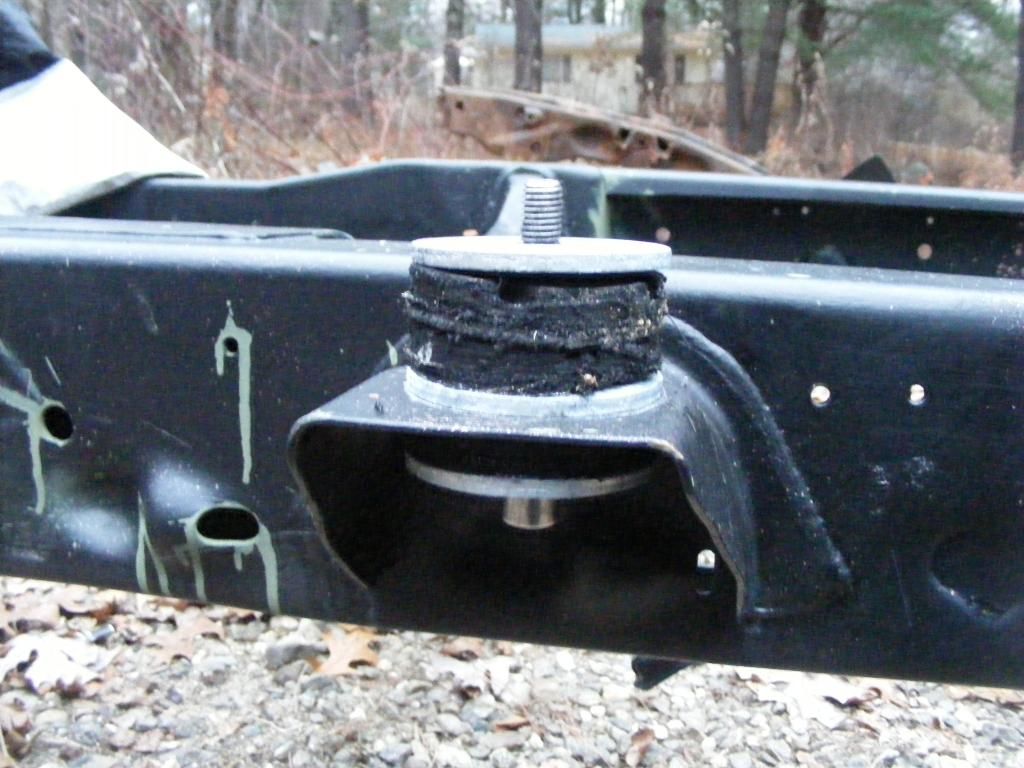
    Body Mounts!!!

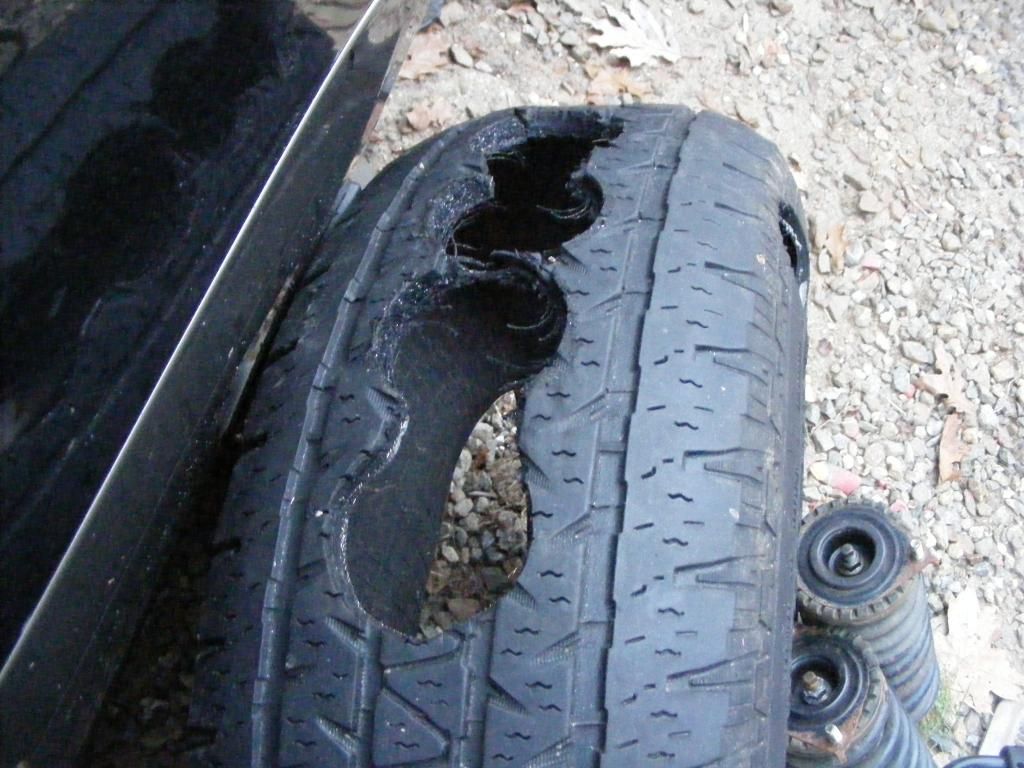
    Being unmotivated to tackle making my own polyurethane mounts, I was inspired by a few threads on another forum (Jalopy Journal, IIRC) which mentioned using pieces of old tire as body mounts. Others suggested conveyer belt material.

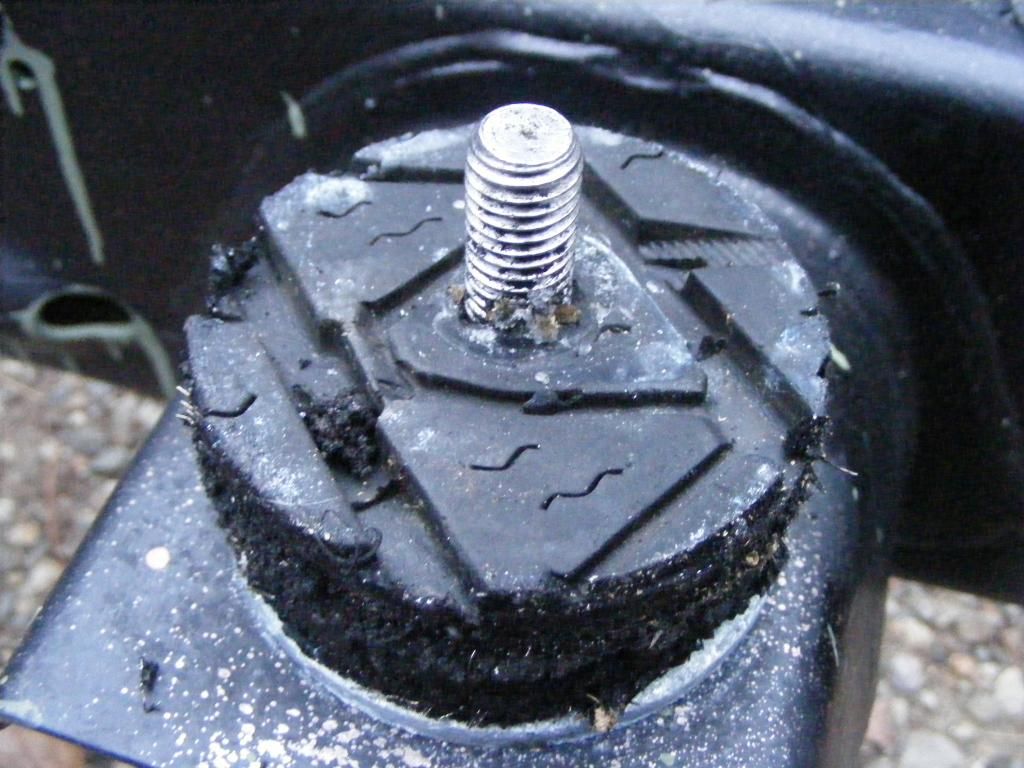
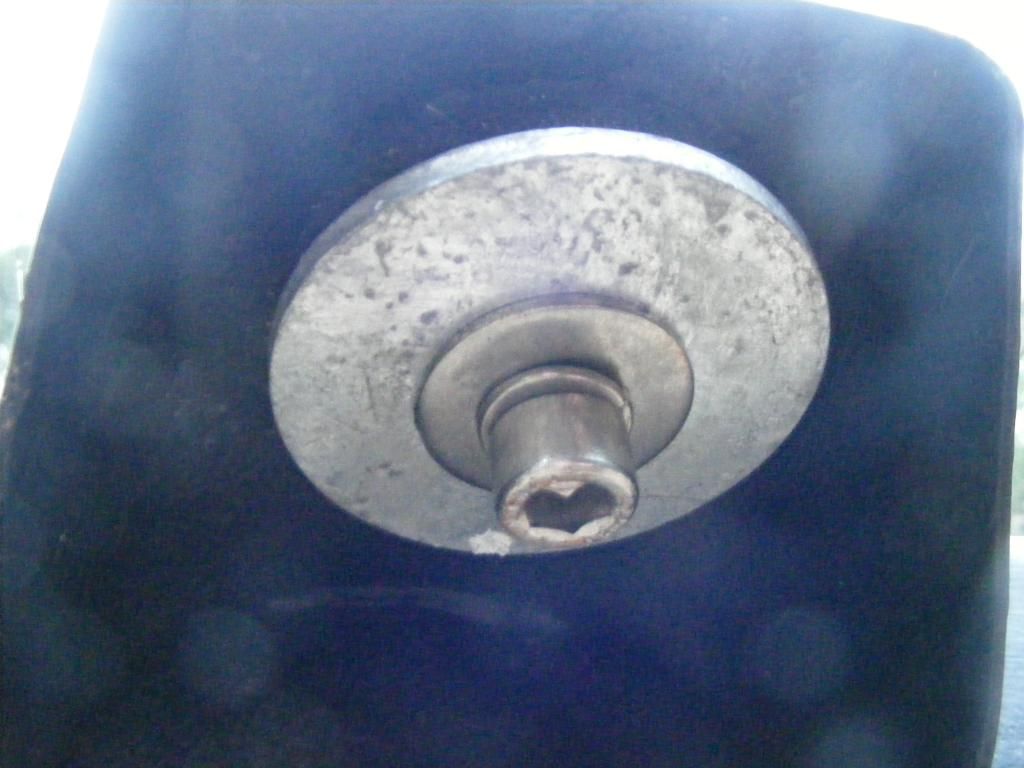
    So this is what I came up with. They are not pretty, but they seem like they'll do the job. I've only made one full mount so far and obviously it has had no weight on it. Think for yourself (because I might have done something wrong or you may want to do something differently) and duplicate at your own risk.

    What I used (click on links to see where I bought the items):

    -old all terrain tire (can use any tire, but the A/Ts are usually thicker)
    -1/4" thick, 1/2" hole, 3" diameter galvanized dock washers x 24 (extra cab)
    -12x1.75x90 Allen headed stainless steel bolts x 8 (extra cab)
    -M12 Split-lock washer x 8
    -M12 Regular washer x 8 (because the hole in the galvanized washer is a little too big for the 12mm bolt)
    -3" hole saw with center pilot bit
    -Powerful electric drill
    -1/2" drill bit
    -Jig saw with a metal-cutting blade


    I used a regular hole saw because I didn't anticipate that there would be so much metal in the tire casing. The regular hole saw CAN cut through the wire strands, but it kills the teeth. So this is what I did: Use a hole saw w/ pilot bit to start 3" circles out of the tire. Once the hole is started, use a metal-cutting blade on a jigsaw to cut the rest of the way around, following the circle. Then use a 1/2" drill bit to widen the center hole...the bit won't do a very good job of widening the hole because the rubber will be mostly stretched and will bounce back; however, it did the job well enough and I was able press each disc onto the bolt with a piece of PVC. Nice snug fit.


    For me, it seemed 3 of these discs (one below the frame mount, two above the frame mount) gave the perfect height (though it may not be exactly the same height as the stock ones when there is weight on them) and allowed plenty of threads up top. 3 galvanized washers were used for each mount.


    Bolt, split lock washer, large OD washer, galvanized washer.


    The tire rubber is a bit harder than the stock mounts, but still a lot more cushion than a hockey puck. Total cost including tools (I mean blades/saws) was under $100. Good luck...hate if you want, but this is what I'm doing!
    Please leave your comments in the box outside my door, right underneath the sign that reads: Shame T. Llama, phD. Your thoughts are very important to me!

  6. Back To Top    #66
    Hi-Fi Junkie Hi-FiDelity's Avatar
    Real Name
    Nick
    Location
    Outside Chicago
    Vehicle
    2005 Dodge Magnum R/T
    Posts
    961
    Join Date
    Jul 2013

    Re: The Victim Build Thread -- Featuring frame replacement

    Quote Originally Posted by TIMMAY!!! View Post
    Body Mounts!!!

  7. Back To Top    #67
    RRAMA NEED $$ TIMMAY!!!'s Avatar
    Real Name
    Tim
    Location
    CT
    Vehicle
    1993 Dodge Dakota, 2003 Subaru Outback
    Posts
    289
    Join Date
    Apr 2013

    Re: The Victim Build Thread -- Featuring frame replacement

    I made a video. This pretty much covers everything I did, though I'll probably post up some more pictures with words an stuff.
    Please leave your comments in the box outside my door, right underneath the sign that reads: Shame T. Llama, phD. Your thoughts are very important to me!

Posting Permissions

  • You may not post new threads
  • You may not post replies
  • You may not post attachments
  • You may not edit your posts
  •  
Back To Top