Page 1 of 5 123 ... LastLast
Results 1 to 10 of 50

Thread: Active 3-way DIY Setup.

  1. Back To Top    #1

    Active 3-way DIY Setup.

    Since my buddies are over here and I totally forgot I didn't post here, I'll carry over my current project from *elsewhere*.


    After some deliberation and gear swapping, I finally decided to build a set of speakers that I want as opposed to just holding myself over with something that was close to what I wanted. For about $500 more than what I had in my passive Kef R500 towers, I'll be able to build a fully active 3-way setup with the following gear:
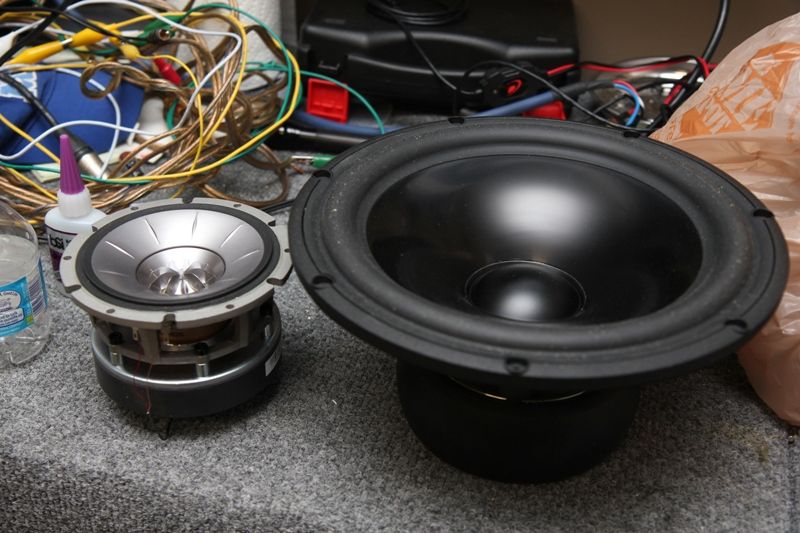
    • Kef R-Series concentric mid/tweeter
    • Scanspeak 26w/8867T 10” woofer.
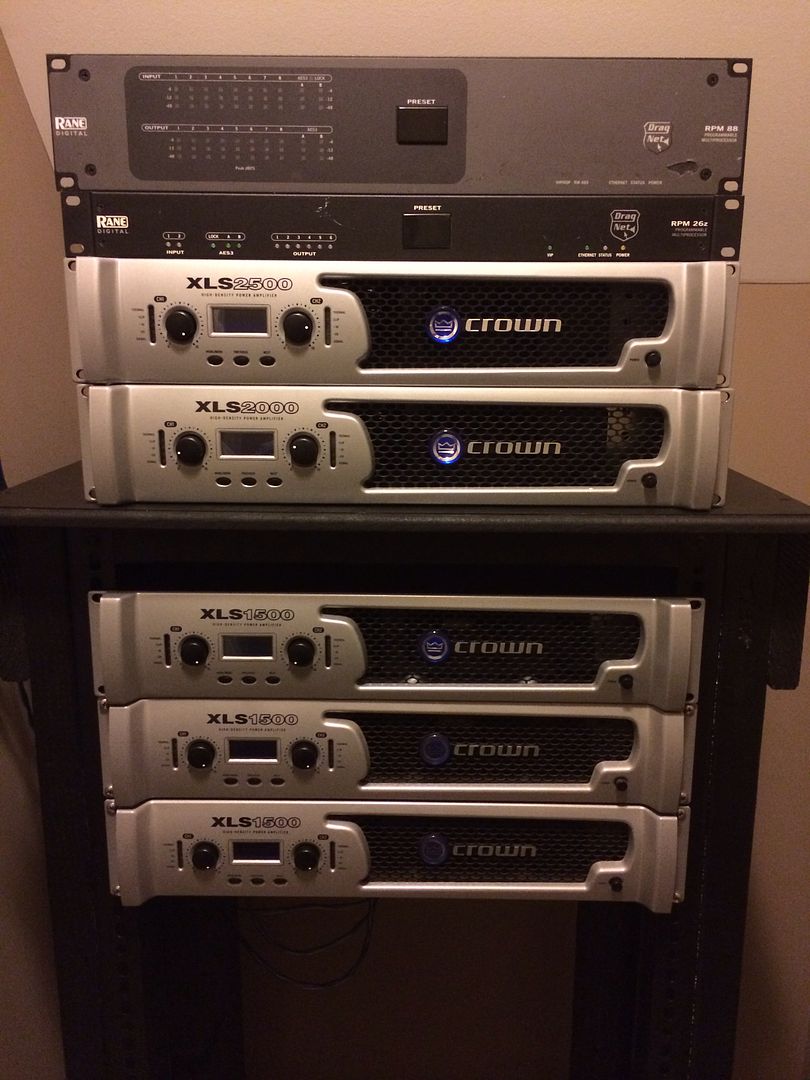
    • Rane RPM26z for processing (crossover and EQ)
    • Crown DriveCore XLS1500 for tweeters (525w x2 @ 4ohm)
    • Crown XLS2000 for mids (650w x2 @ 4ohm)
    • Crown XLS2500 for woofers (775w x2 @ 4ohm)


    Total power overkill, I know, but I had a couple already and I see no downside to using them. Talk about headroom… sheesh!

    Initially, I had planned to use dual woofers per tower. This was intended to keep the driver within beaming at the crossover but also allow me the abillity to smooth the LF response with the 2nd woofer. As the testing and simulations went on, I realized that using a single 10” would behoove me in regards to vertical polar and strike a nice balance for where I intended to cross thanks to the mid’s lower frequency limits and the woofer’s higher frequency limits, combined with baffle step. Ultimately, I plan to have the crossover between the woofer and concentric mid in the neighborhood of 400-500hz. I may still be lacking in regards to the LF smoothness, but it's a tradeoff I'm willing to take.

    I’m really not a fast worker when it comes to wood. I’m not a fan of building anything because I can’t achieve the ‘measure twice, cut once’ aspect. With that said, this build really will be simple at least with respect to the cabinet. I wanted to go with curved cabs but I was worried I’d spend more time and money buying materials than I have at my leisure, it’d make more sense to start with a very KISS method and possibly revisit a more complex, but aesthetically pleasing tower design this summer when I have time.

    Each cabinet is 12x13x48. This size was chosen in order to achieve a baffle step between the woofer and mid at about 500hz. Again, I’m just assuming that doing so allows for a more natural driver response without the need to put any correction in to the system. Of course, the 10” woofer size really drives the necessary baffle width… I suppose it all just sort of fell together in this regard. The woofer height will be placed about 23” from the floor. This height was chosen as it helps me stay within some reasonable range of lobing limits in conjunction with being at a good frequency with respect to floor bounce. The concentric will be placed roughly 41” from the floor. This height was chosen because that’s approximately where my head will be. There’s nothing I can’t stand more than looking down on a speaker at a normal seated height. It totally kills my psyche, man.

    I did a klippel test on each woofer to obtain large and small signal parameters. Small signal specs indicate a sealed enclosure size of 0.75ft^3 to hit a Qtc of 0.707, though my measurements showed different. Ultimately, based on my measurements, I arrived at a sealed volume of about 1.75ft^3. This puts the Qtc at about 0.60. Namely, however, it gives me some play room and by adding or removing stuffing, I should be able to achieve a Qtc that I desire. The upper section, where the midrange concentric will be housed was not targeted for any particular Qtc. I did, however, model up the enclosure size I plan to use (simply by default of bracing location and cabinet size) and found the f3 to about 213hz. This is less than half of the desired crossover point, so I think Im OK here. I wanted the extra room in the enclosure to be able to stuff it with varying materials. A target Qtc isn’t important to me here. Though, managing the internal reflections is.


    On to the build...

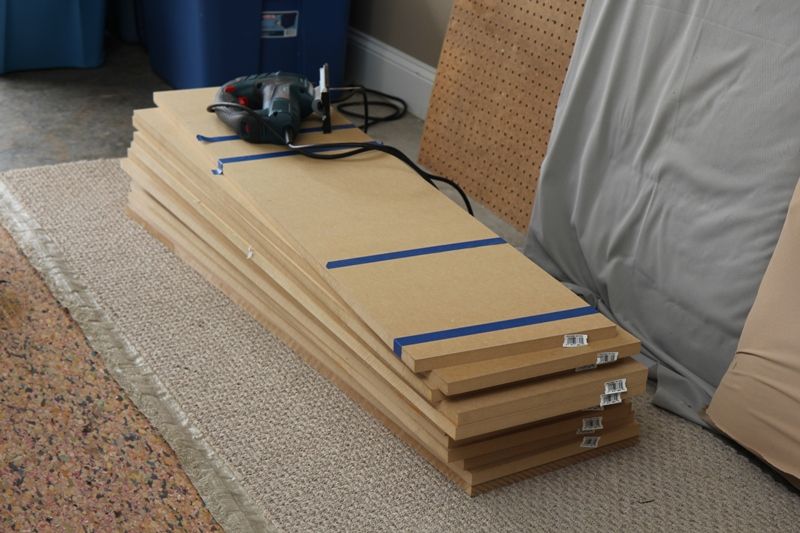
    I went to a local lumber yard to look at their Birch offerings. $65/sheet for domestic. And it looked good. The problem was they wouldn’t cut the sheet in half for me to fit in my civic. And they closed soon which meant borrowing a truck wasn’t going to happen and I wanted to get started the next day and work on the project during the weekend. I went to the local Home Depot and found they sell 12x48” MDF shelving pieces for about $5/sheet. These were practically perfect for me. $75 later I drove back home with a stack of 13.

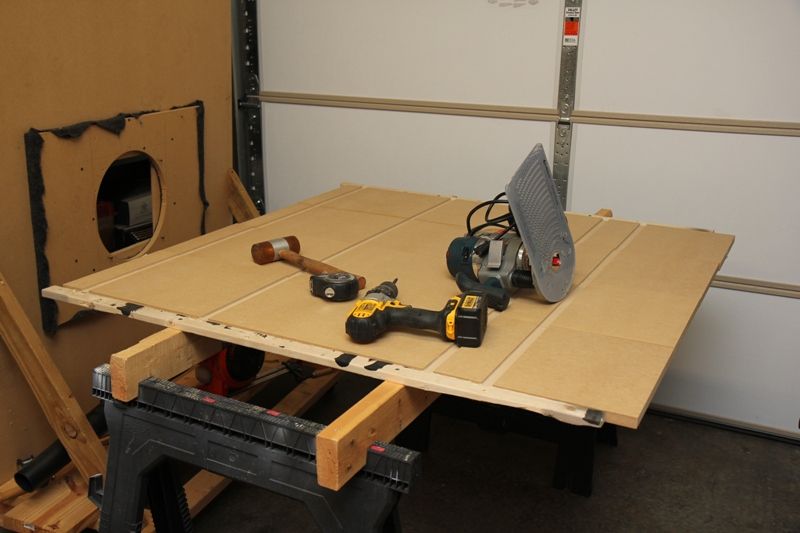
    All said and done, I didn’t get too far this weekend. I did manage to cut dados in the main structure pieces for both enclosures to support the 4 braces I plan to have. In my first time ever using a dado, I learned a couple things. So, if you look closely you’ll probably see some bad spots where those lessons were learned.
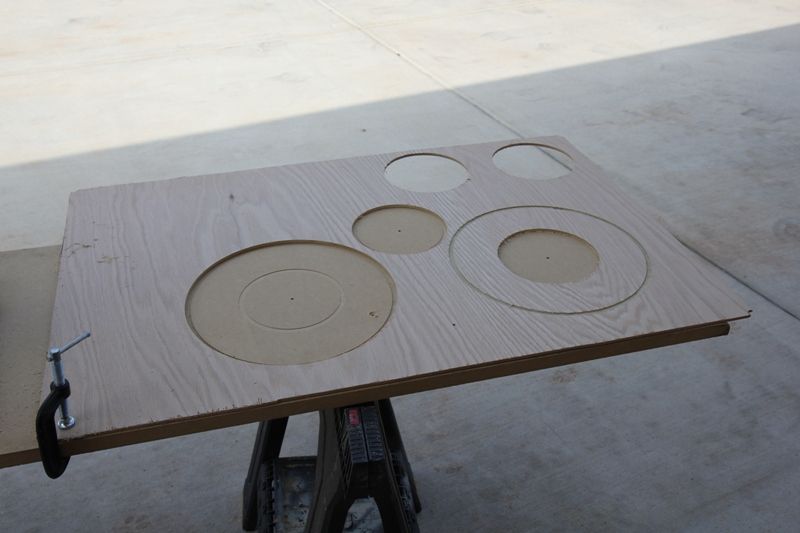
    I also took a scrap piece of birch and cut some practice holes for the drivers so I’d know exactly what size the OD, ID, and depth was in order to flush mount them. Pictures are below.


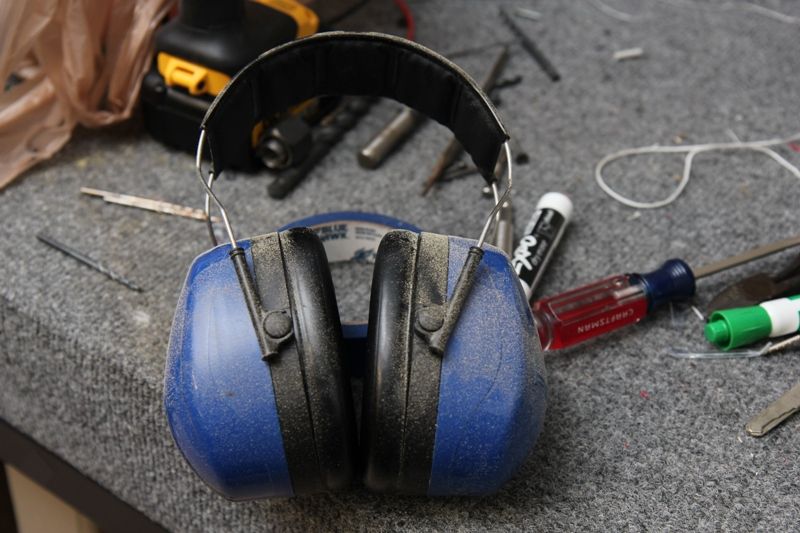
    Sawdust sucks! Thank goodness for respirators.

  2. Back To Top    #2

    Re: Active 3-way DIY Setup.

    I've been going rather slow with this build. I've been doing this while my 3 year old plays in the driveway on her new bike, so I'll work a bit and then jump on mine to ride with her. Trying to balance this project with being a good Dad. Needless to say, I haven't gotten to where I'd like to be, but I have managed to make some decent progress. I got all the pieces cut for the tower and managed to glue them up, sans the front baffle.

    So, here's the point at which I beat myself up... you ready? Let's go...

    This was my first time cutting dados and I'd say I got about 75% of them right. The other 25% are about 1/8" too large or have crazy spots in them because the router wandered.
    Reading up on dados before purchasing a bit for the router, I found out that typically 3/4" mdf is actually typically undersized and the dado bit for this kind of project is typically a hair smaller: 23/32". I ordered one up from Amazon. When I got the MDF pieces I realized they're actually oversized... say 0.80". Really?! Man! So, I wound up having to make multiple passes anyway, which effectively doubled the time I thought it would take. Lesson? Don't buy a bit until you get the wood... that, or just plan on doing multiple passes since not all wood is created equal.

    I also made a TOTAL nooB mistake when cutting the dados for the top braces (3rd & 4th from the bottom in the picture below). I had taken some pre-measurements to make sure those two would give me the airspace needed for the woofer, and I also liked the idea of having a gap between the woofer and mid volumes. Thinking I could treat it with something later (made a post about it here). Anyway, at some point in the process, I cut the top brace about 2" too high; putting it's location just under where the midrange would mount. Didn't realize it until after I glued up the first cab. Speaking of realizing your mistake once you've already glued, I also realized I didn't cut the air holes for the woofer enclosure brace (2nd brace from the bottom) so I had to do the best I could with a hole saw and jigsaw. I got enough material cut out but it looks ugly. Luckily I caught that before I glued the 2nd tower up so I could cut that brace as needed before it was glued in to place. I'd like to say lesson learned, but I doubt it.

    I really seem to have no ability to cut a perfect square but somehow they turned out OK. There are some gaps that are going to get some bondo-glass treatment for sure to cover them up and sturdy up the structure. Somehow or another when cutting the top/bottom pieces, my straight edge wasn't so straight so at one point the piece matches up perfect with the cab, but at the other end, it's off by nearly 1/4". Ugh. But, as sad as it is, I'm actually REALLY looking forward to the bondo/Rage Gold sanding phase on these. That means I'm closer to the end and those spots should clean up. Anything is better than cutting more MDF. I had that stuff all in my beard. Glad I have a respirator because MDF boogers suck!

    Maybe you guys can learn some lessons from my mistakes. But, judging by the caliber of builds here, I'm probably the only one making these mistakes and I also seem to be the only guy here who can't cut a square to save his life!

    All said and done, however, I'm pretty happy with how things turned out. The small gaps I have can be remedied and I can take pride in knowing I did this all myself, as much as an aggravation and time consumer it was. I'm about 80% done with the construction. I'm going to double layer the baffle so I need to glue those pieces together. Before they are glued in, I'll line the enclosures with varying density material and route the wires where needed. Not a whole lot to see, but here's some pictures.


  3. Back To Top    #3

    Re: Active 3-way DIY Setup.

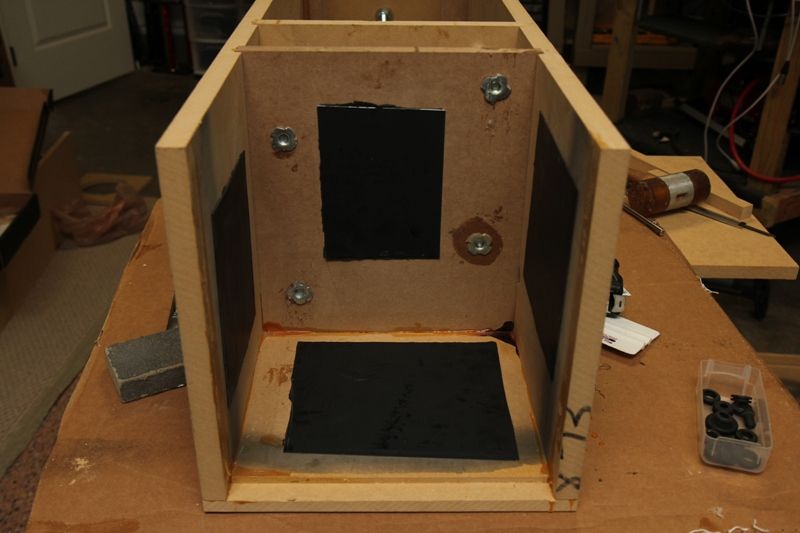
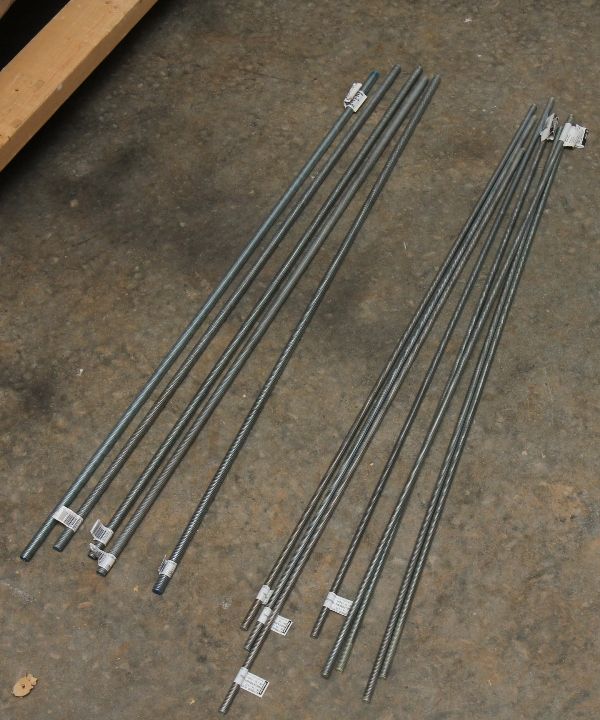
    I've decided to add some tie-rod in to the equation to provide additional bracing. The reason why is because the rod will hold in both compression and tension, and will do so much better than a jacked up, wanna-be squared brace. $50 in all thread and hardware and I'm starting to brace the fire out of this enclosure.

    These are only the vertical supports. I'm actually also considering adding two more main supports in the woofer cabinet and running a board between those two to act as a seat for the woofer and take any torsional load off the front baffle. Though, that may be completely unnecessary.

    Anyway, here are a couple pictures. That middle brace got butchered. The other tower will look better. Thank goodness there'll be a baffle to cover up the screw ups.

    Attachment 45501

    Attachment 45502

  4. Back To Top    #4

    Re: Active 3-way DIY Setup.

    The above was carried over from the PE forum, so here's the latest update.


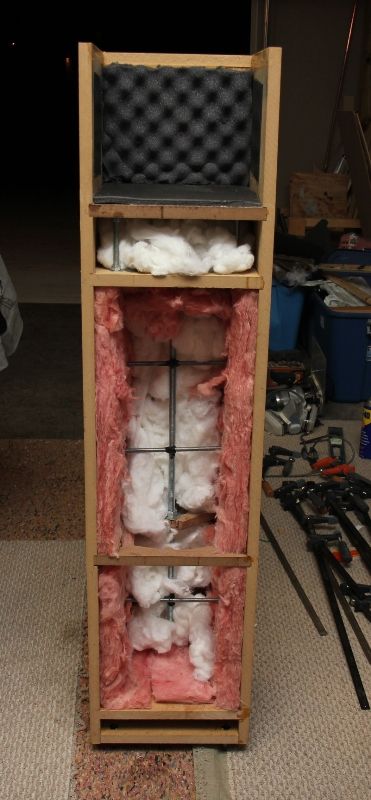
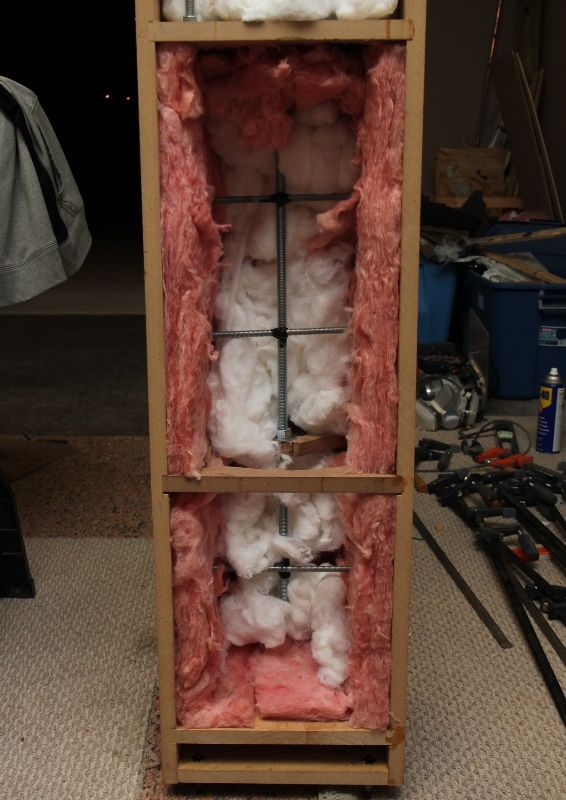
    I went and bought more tie-rod.


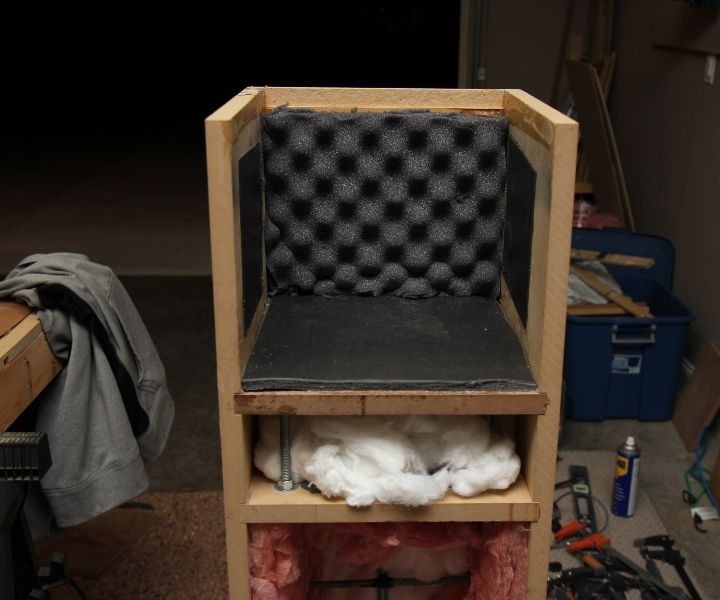
    Some CLD on the midrange enclosure section


    Insulation/foam/stuffing, with some side threaded rods added to the woofer section.


    Close ups, showing some LLP for added mass loading to the midrange enclosure.


  5. Back To Top    #5
    Big Daddy chad's Avatar
    Real Name
    Chad, among other colorful phrases.
    Location
    East-Central Illinois
    Vehicle
    2004 Civic Si
    Posts
    1,182
    Join Date
    Mar 2013

    Re: Active 3-way DIY Setup.

    Ain't nothing wrong with MDF in the house. Looking good man!

  6. Back To Top    #6

    Re: Active 3-way DIY Setup.

    Thanks!

    I hesitate to post build pictures because my wood working skills are nill. But, I'm pretty excited about what it's going to be. I put in about 2 months' of research, simulating and testing stuff before I even started. I even built a test speaker just to play around with various woofer locations for a dual 8" woofer setup, which I wound up scrapping in lieu of the single 10". That scan is a thing of beauty.

    I'm still trying to decide if I want to fill that air gap between the woofer and mid enclosures with something. Great stuff was suggested, but that stuff is a mess. I think an air gap with some light fill (as pictured) is best. The great stuff is a great mess and I think the air gap as a good air density variation to the cabinet. Sony actually does something similar it seems with their flagship AR-1 speakers. I was reading their "white paper" on the Sony SS AR1 speaker and they mention leaving an air gap between the woofer enclosure and mid enclosure in the cabinet. Start on page 6. Here's the excerpt:
    What appears from the outside to be a single enclosure is actually divided inside by two thick birch partitions with an air cavity in between. Just as a double-pane window with air in between helps provide thermal insulation in winter, the partitions and air cavity create two well-insulated enclosures: one for the woofer and one for the midrange/tweeter. The mid/tweeter sub-enclosure is also vented with a bass reflex port that’s been carefully tuned and positioned.

  7. Back To Top    #7
    Big Daddy chad's Avatar
    Real Name
    Chad, among other colorful phrases.
    Location
    East-Central Illinois
    Vehicle
    2004 Civic Si
    Posts
    1,182
    Join Date
    Mar 2013

    Re: Active 3-way DIY Setup.

    I would not put foam in there.

  8. Back To Top    #8

    Re: Active 3-way DIY Setup.

    I'm really not planning on it. I had it in my hand at the hardware store and then remembered all the times I've cursed it. Not only that, but IF I have to get in that section somehow, for some reason, it's going to be a nightmare. I've already coupled the two braces that make up that gap, but I did so with tie rod to stiffen up the panel. I just have the gut feeling a simple air gap is better all around. But, I have nothing to back that up with... other than it's just plain messy.

  9. Back To Top    #9
    Big Daddy chad's Avatar
    Real Name
    Chad, among other colorful phrases.
    Location
    East-Central Illinois
    Vehicle
    2004 Civic Si
    Posts
    1,182
    Join Date
    Mar 2013

    Re: Active 3-way DIY Setup.

    It's pretty rigid when dry, we all know this, if anything it will defeat the purpose by coupling the 2 chambers further.

  10. Back To Top    #10

    Re: Active 3-way DIY Setup.

    some is. there's a different version that is intended to remain flexibile. I believe that's the window & door version.

    oh, I got one word for you: speakOn.

Posting Permissions

  • You may not post new threads
  • You may not post replies
  • You may not post attachments
  • You may not edit your posts
  •  
Back To Top