Results 1 to 9 of 9

Thread: Custom A-pillars - The Blockrocker Way!

  1. Back To Top    #1
    A Refined Basshead blockrocker's Avatar
    Location
    Calgary, Alberta
    Vehicle
    2018 Nissan Frontier
    Posts
    623
    Join Date
    Nov 2019

    Custom A-pillars - The Blockrocker Way!

    Professionals HATE this one simple trick......


    I have been attempting to build some custom a-pillars for some time now. The pods I have been using are okay, but it was time to give the frogs a proper place to ribbit. It honestly took me four tries to get them right. Between aiming the drivers properly, minimizing bulk in the design and actually wrapping these buggers in fabric, proved to be a bit too much for me. Repeatedly! Lol.

    I tried fleece three times but could not get the stretch right without a huge mess or wrinkles everywhere. Finally I tried the PS Sound technique, with thin slats of ply. This worked better for me but I still found the shape funny and bulky.

    Finally, I had an idea.....Veneer! That shit worked like a charm. A roll cost me about 5 dollars and it could be done with CA or hot glue. It's flexible, stiff and very easy to cut and shape. HIGHLY HIGHLY RECOMMENDED! I know the pros may balk at me, but for the rookies, this is the ticket. It saved time, resin and a whole lot of frustration.

    Name:  pills 1.jpg
Views: 993
Size:  54.1 KB Name:  pills 2.jpg
Views: 962
Size:  59.8 KB Name:  pills 3.jpg
Views: 978
Size:  61.2 KB Name:  pills 4.jpg
Views: 975
Size:  51.2 KB

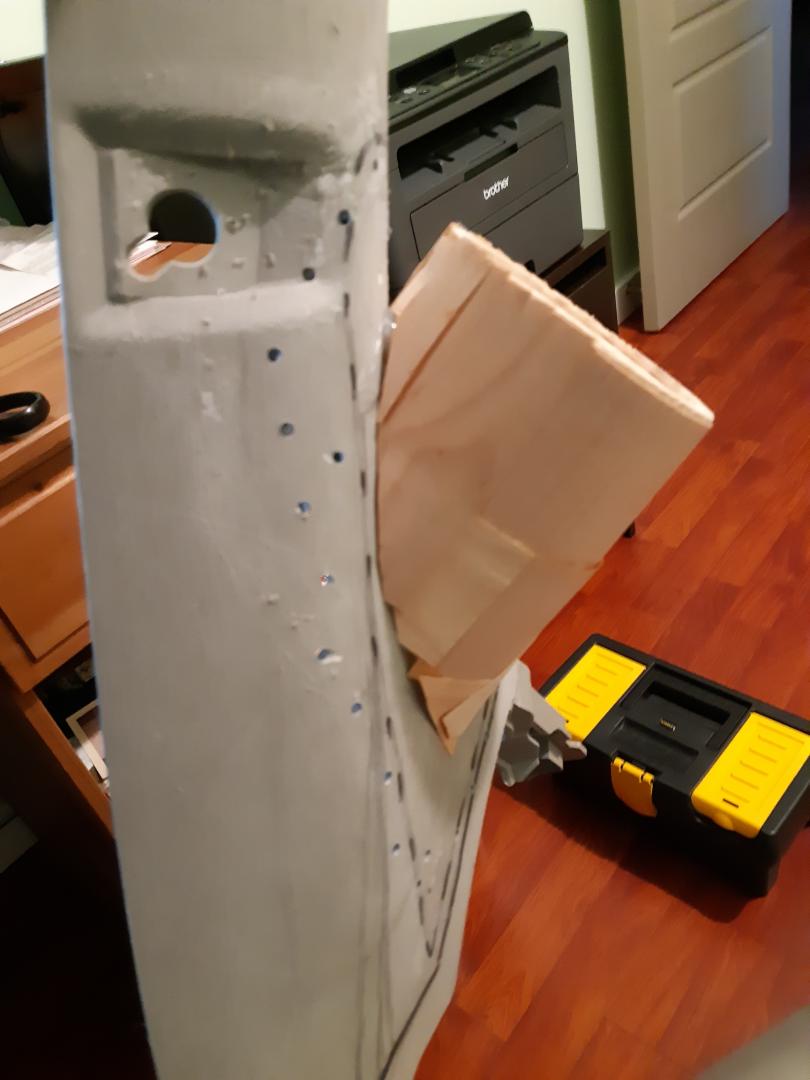
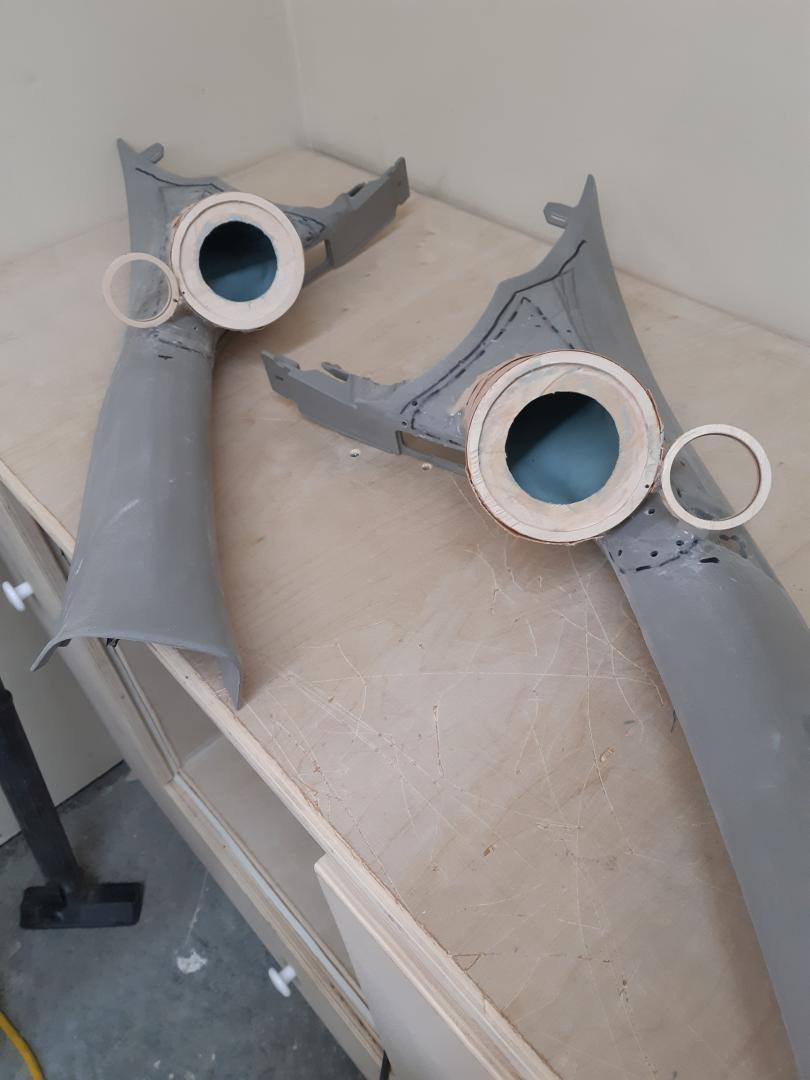
    First I made my rings and fitted the mid rings only. Since they are going to be sealed (yeah, yeah, I know) I used the milkshake before any layering, to ensure the veneer was stiff enough to work with. I also drilled holes in the pillar to make sure the resin and fillers create one solid piece.

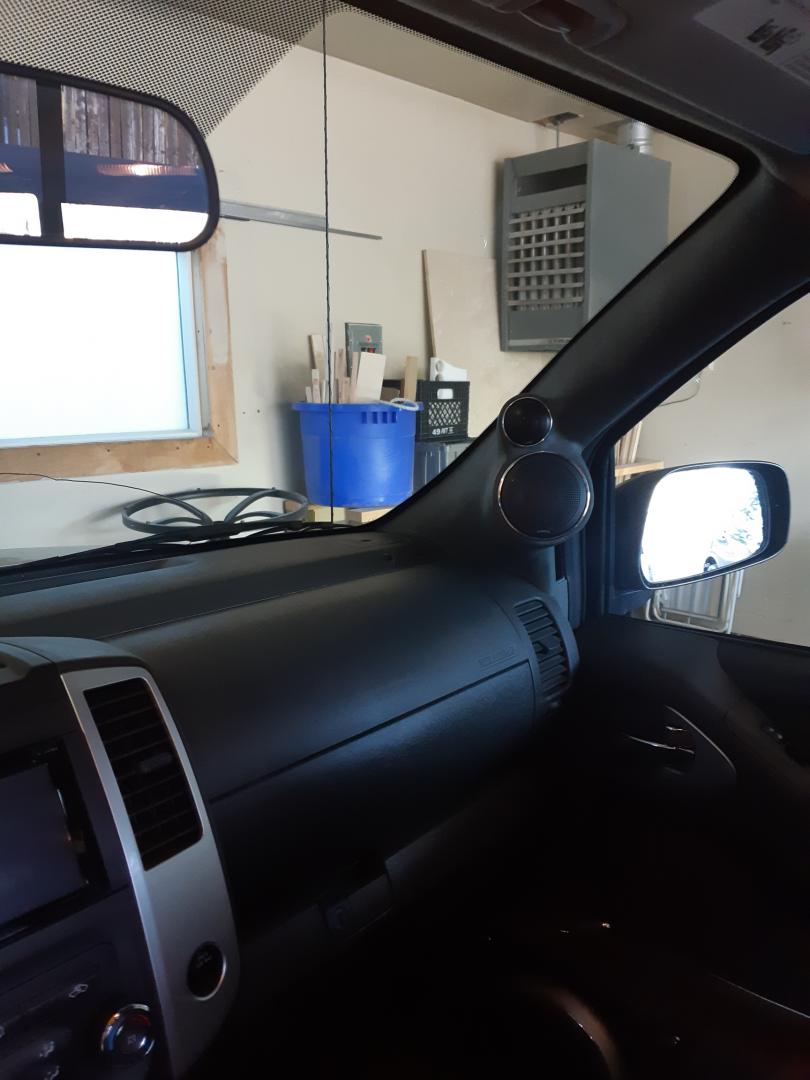
    Next I added and aimed the tweeter rings and veneered them into shape. Then fiberglass and filler. I didn't take enough pics of that part, I apologize.

    Name:  pills 5.jpg
Views: 978
Size:  69.9 KB Name:  pills 6.jpg
Views: 942
Size:  61.5 KB Name:  pills 7.jpg
Views: 944
Size:  67.2 KB Name:  pills 8.jpg
Views: 944
Size:  62.6 KB

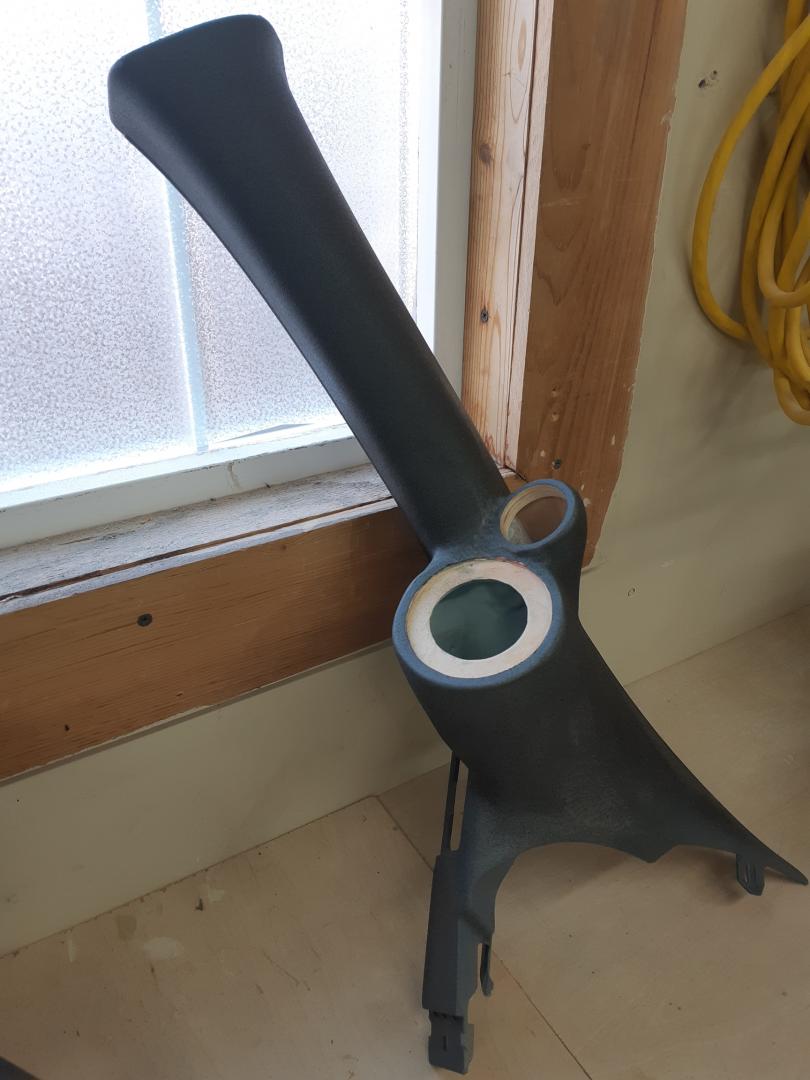
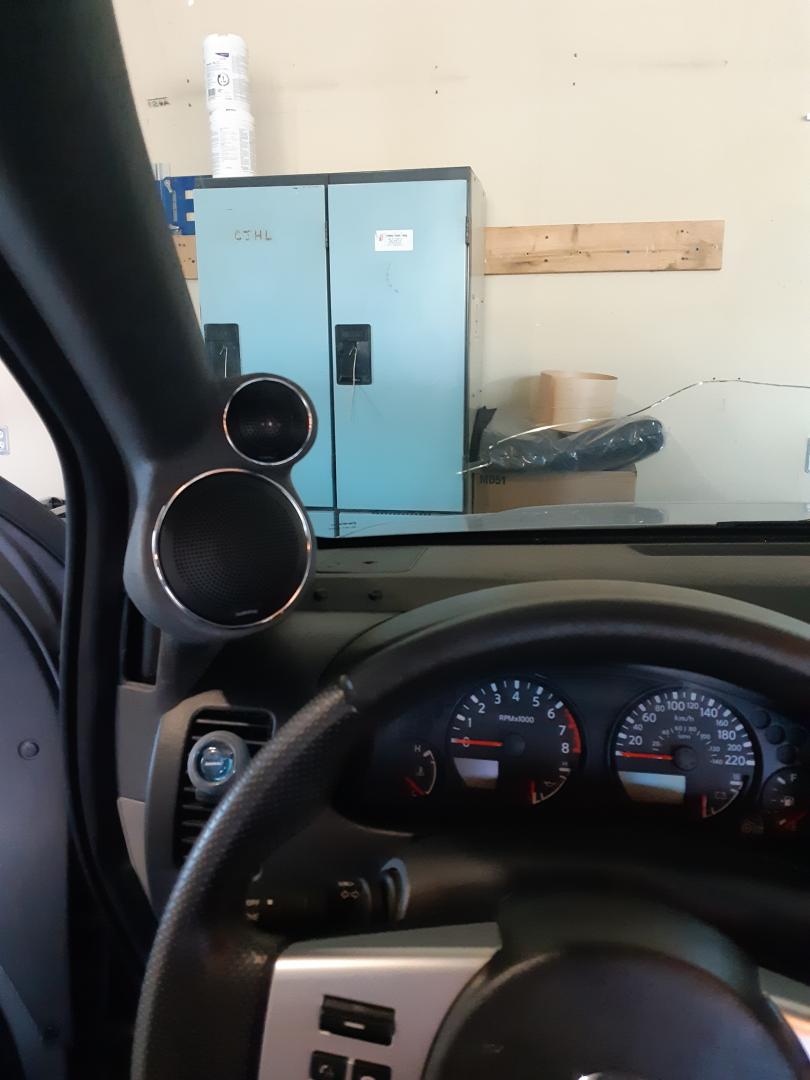
    I tried my best to keep the layers thin enough to prevent an ugly shape but thick enough that they are very, very solid and heavy. Since I knew I wasn't going to wrap them in fabric, I did my best to ensure smooth feathering and shaping. You can almost never spend enough time doing this. Lol. Eventually I was pretty satisfied after getting it sanded down to 220 grit. I used a textured spray paint for the finish, so I knew I didn't need it any more then that.

    Name:  pills 9.jpg
Views: 946
Size:  67.4 KB Name:  pills 10.jpg
Views: 924
Size:  85.6 KB Name:  pills 11.jpg
Views: 931
Size:  90.9 KB

    Several coats of primer between filling in the pockmarks. Plus test fits to make sure I was actually going to be able to get these back in the truck. Lol. Very important. Finally I used 3 coats of Rustoleum multicolor texture spray paint. I settled on this after my attempt to get SEM texture was proving to be too difficult. The color is nearly perfect and the texture, although finer grit and coarser feel, still does a great job at blending into the truck. In my opinion, the pics do not do it justice. Really sharp finish and half the price.

    Name:  pills 12.jpg
Views: 955
Size:  69.2 KB Name:  pills 13.jpg
Views: 925
Size:  75.8 KB Name:  pills 14.jpg
Views: 952
Size:  144.0 KB Name:  pills 15.jpg
Views: 991
Size:  159.1 KB

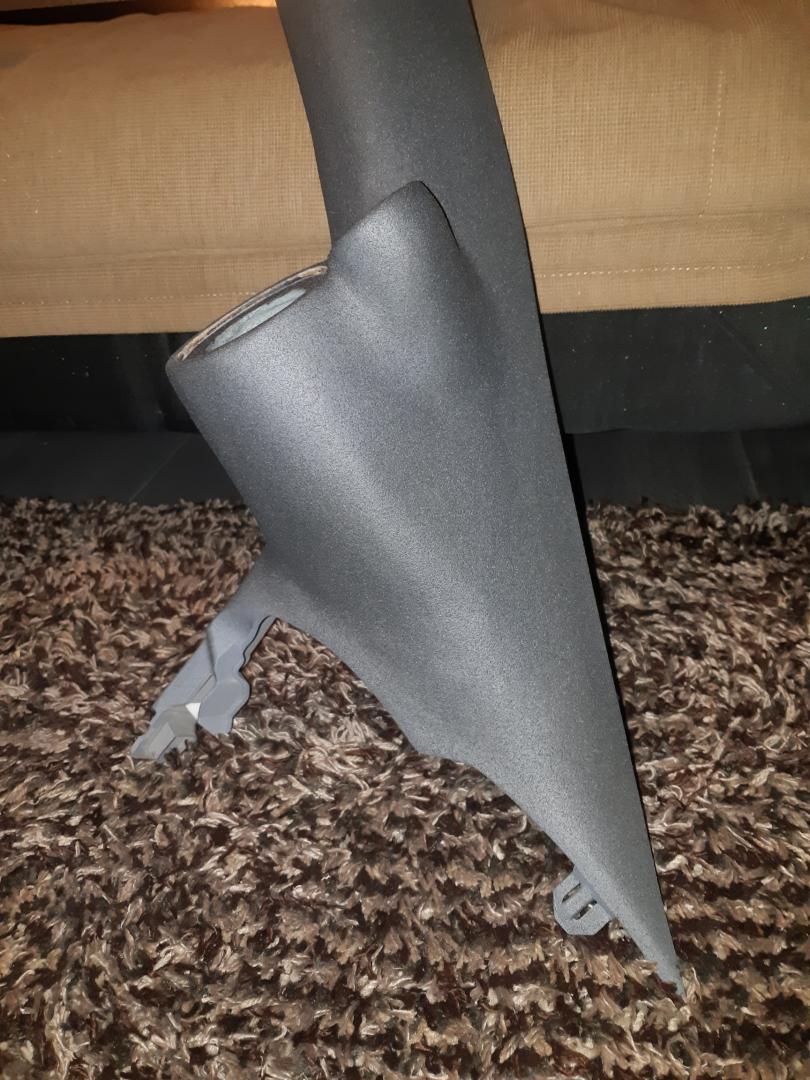
    Final fit and finish was pretty simple and straight forward. Ran the speaker wires through the pillars and filled the holes with putty. Snapped them into place and finally got the drivers into there newly built home.

    Name:  pills 18.jpg
Views: 1041
Size:  63.9 KB Name:  pills 19.jpg
Views: 1066
Size:  72.0 KB Name:  pills 17.jpg
Views: 964
Size:  90.0 KB Name:  pills 20.jpg
Views: 1008
Size:  74.3 KB Name:  pills 21.jpg
Views: 962
Size:  133.2 KB

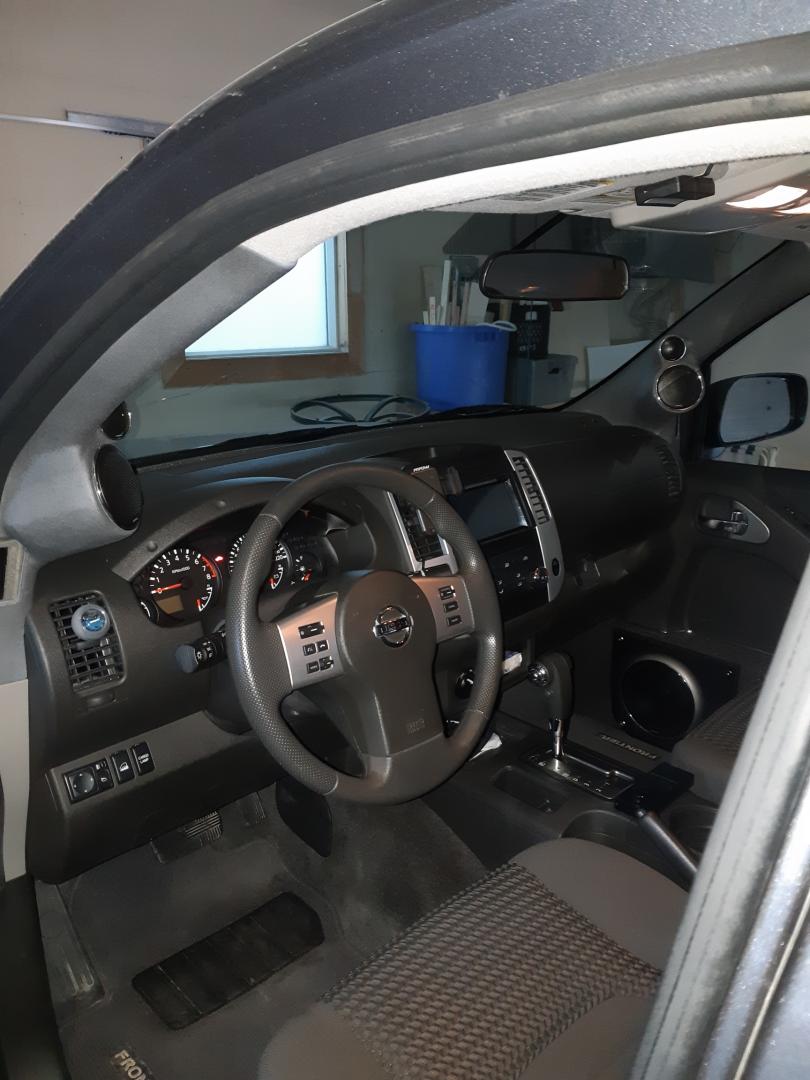
    I still need to paint a few trim pieces from the truck but all in all this was a very successful project. I will be doing some serious tuning in the next few days and hopefully finish up the rest of the upgrades. Stay tuned to my never ending build log, as I will update that with pics of my new subwoofers, box and amps. Adire Tumults and Rockford....oh my!!

    Thanks for checking this out!!

  2. Back To Top    #2
    Senior Member jrwalte's Avatar
    Location
    Atlanta
    Vehicle
    2007 Corolla
    Posts
    293
    Join Date
    Oct 2019

    Re: Custom A-pillars - The Blockrocker Way!

    Good job on the pillars. They both on axis?

    What's catching my eye is those door speakers, though Are those sealed in a box that runs along the bottom of your door? I likie.

    BTW, you got a little crack there on your windshield heh

  3. Back To Top    #3
    A Refined Basshead blockrocker's Avatar
    Location
    Calgary, Alberta
    Vehicle
    2018 Nissan Frontier
    Posts
    623
    Join Date
    Nov 2019

    Re: Custom A-pillars - The Blockrocker Way!

    Quote Originally Posted by jrwalte View Post
    Good job on the pillars. They both on axis?

    What's catching my eye is those door speakers, though Are those sealed in a box that runs along the bottom of your door? I likie.

    BTW, you got a little crack there on your windshield heh
    Thanks very much. The tweets are about 10-15 degrees off (towards center) and the mids are about 20-25 degrees (pointed up). The 6.5s are indeed sealed boxes. Bolted in place using only factory bolt locations. No extra holes - kind of proud of that.

    No basshead vehicle is complete without a cracked windshield. Thanks jrwalte

  4. Back To Top    #4

    Re: Custom A-pillars - The Blockrocker Way!

    Wow, those turned out great!
    2019 Jeep Wrangler 2 Door - Morel Elate 3 way, Mmats HiFi 6150 & M2000.2, Hutchinson NDFEB 10", MiniDSP w/DL, Fiio X5

    #TRUMP2020

  5. Back To Top    #5
    A Refined Basshead blockrocker's Avatar
    Location
    Calgary, Alberta
    Vehicle
    2018 Nissan Frontier
    Posts
    623
    Join Date
    Nov 2019

    Re: Custom A-pillars - The Blockrocker Way!

    Thanks DR, I really appreciate that. Especially from a guy with your skills. You guys on this forum keep forcing me to up my game, and now I am forever grateful.

  6. Back To Top    #6

    Re: Custom A-pillars - The Blockrocker Way!

    Looking good!

  7. Back To Top    #7
    Refuses to grow up... mumbles's Avatar
    Real Name
    Eric
    Location
    ATL
    Posts
    285
    Join Date
    Sep 2016

    Re: Custom A-pillars - The Blockrocker Way!

    Somehow I missed this post... nice work! How did you come to choose the speaker angles, did you do any experimentation?

  8. Back To Top    #8
    A Refined Basshead blockrocker's Avatar
    Location
    Calgary, Alberta
    Vehicle
    2018 Nissan Frontier
    Posts
    623
    Join Date
    Nov 2019

    Re: Custom A-pillars - The Blockrocker Way!

    Quote Originally Posted by mumbles View Post
    Somehow I missed this post... nice work! How did you come to choose the speaker angles, did you do any experimentation?
    Thanks very much!

    The mids I aimed at a single point in the middle of the truck, above the back window. The tweets I aimed at the drivers headrest. I did attempt some experimenting before building these particular pillars, but much of the figuring out came from my previous setup, with 3d printed pods on the dash. The pods were much easier to play with and gave me a good idea for what I wanted to try with these pillars.
    As for the aiming, I used a straightened piece of stiff wire (similar to a coat hanger) and a lot of patience to try and glue up the rings to the pillar, with the aiming where I wanted it to be. For the record, nothing is perfect, but it was a fun project and I learned lots of tricks to use in my next attempt.

    Cheers!

  9. Back To Top    #9
    Refuses to grow up... mumbles's Avatar
    Real Name
    Eric
    Location
    ATL
    Posts
    285
    Join Date
    Sep 2016

    Re: Custom A-pillars - The Blockrocker Way!

    Quote Originally Posted by blockrocker View Post
    Thanks very much!

    For the record, nothing is perfect, but it was a fun project and I learned lots of tricks to use in my next attempt.

    Cheers!
    In the end, that's what matters, right?

Posting Permissions

  • You may not post new threads
  • You may not post replies
  • You may not post attachments
  • You may not edit your posts
  •  
Back To Top