Page 4 of 7 FirstFirst ... 23456 ... LastLast
Results 31 to 40 of 67

Thread: The Victim Build Thread -- Featuring frame replacement

  1. Back To Top    #31
    Member Slammer's Avatar
    Real Name
    Dean
    Location
    NC
    Vehicle
    2006 Lexus IS350
    Posts
    64
    Join Date
    Jan 2014

    Re: The Victim Build Thread -- Featuring frame replacement

    I did the torsion bars on my Sierra and was happy with the height improvement but hated how the front end was "super sprung" whenever I went over a bump. Don't get me wrong, I wouldn't reverse it if I were given the opportunity, just learned to take it slow over speed bumps. The difference in the torsion makes the front end PUSH down over the slightest bump. As for the rear diff swap, you may want to keep a drive shaft issue in mind. I went from an 8" to a 9" Ford rear end many years ago and found out that the distance was different (longer yoke on the 9") and have to have my drive shaft cut and balanced. Hopefully you won't, but a heads up regardless.

  2. Back To Top    #32
    RRAMA NEED $$ TIMMAY!!!'s Avatar
    Real Name
    Tim
    Location
    CT
    Vehicle
    1993 Dodge Dakota, 2003 Subaru Outback
    Posts
    309
    Join Date
    Apr 2013

    Re: The Victim Build Thread -- Featuring frame replacement

    The lack of updates is due to my being busy. Sorry! The project has been progressing slowly and I have plenty of updates, which I'm going to post one at a time. First a quick progress update:

    I am currently in the process of painting the frame. I have removed everything from the new frame that isn't welded in, including the leaf spring hangers and rear cross members, which are riveted in. I ground down a total of 28 rivets. This is not a quick process; therefore, I am cleaning and painting the frame in "one-day" sections. This is so I can avoid surface rust forming on fresh sections and apply paint as soon as possible after stripping the frame to bare metal. More detailed updates will be posted shortly. But we'll start with this:

    Rust Removal using Electrolysis

    A member on NASIOC posted a thread about using electrolysis to remove rust from rusty parts, and I decided I had to give it a try.

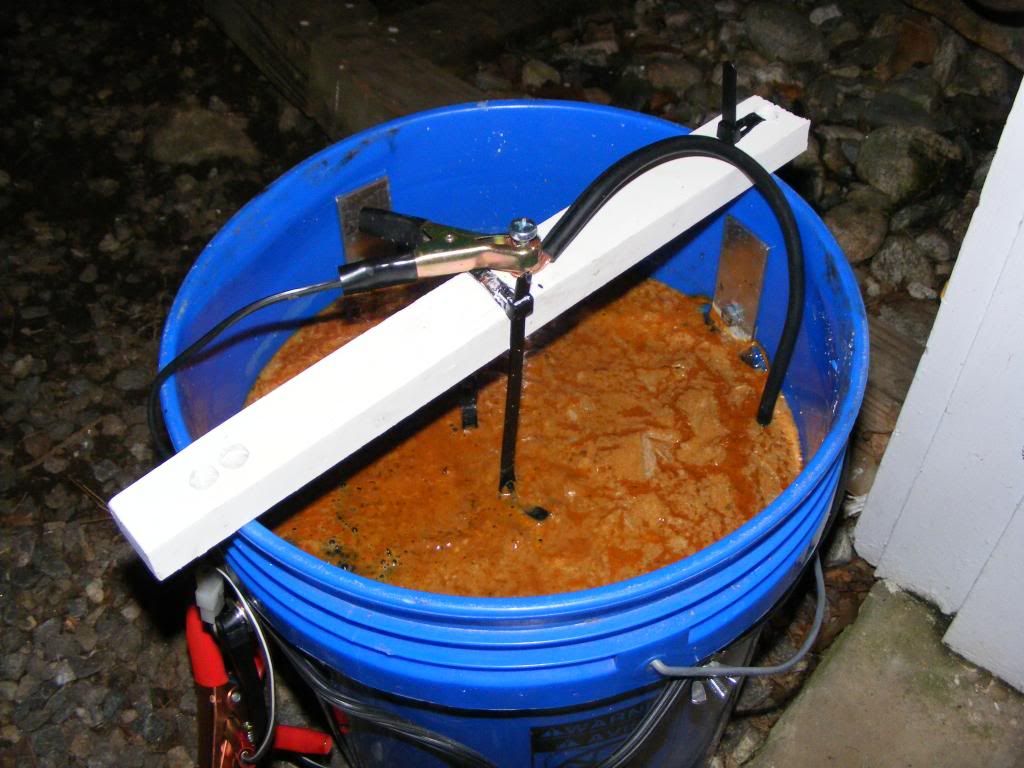
    First of all, I'm not a chemist. As I understand it, rust is Fe2O3 (Iron Oxide). Electrolysis uses electric current to promote the removal of negatively charged oxygen ions from the rusted part (cathode) towards the anode, which is a positively charged piece of metal, through an electrolytic (current conducting) medium. Don't know what I'm talking about? Neither do I, but the great thing is that you don't have to! This is a very inexpensive and easy to setup process. This is my setup:

    -Rusty part: This will be your cathode.
    -Sacrificial steel: Get PLAIN steel. Not galvanized, stainless, or coated. Just plain rebar or flat steel. 4 ft. of 1 1/2" wide flat steel did it for me.
    -Clean 5 gallon bucket
    -Battery charger: mine is a trickle charger (12V/1.5A). I had doubts about it being powerful enough, but it works just fine. A slightly more powerful battery charger would likely yield quicker results.
    -Arm & Hammer washing soda (sodium carbonate): This is your electrolyte. I have heard that baking soda (sodium bicarbonate) will work, but not as well.
    -Small piece of wood to lay across bucket
    -Wires
    -Hardware as necessary

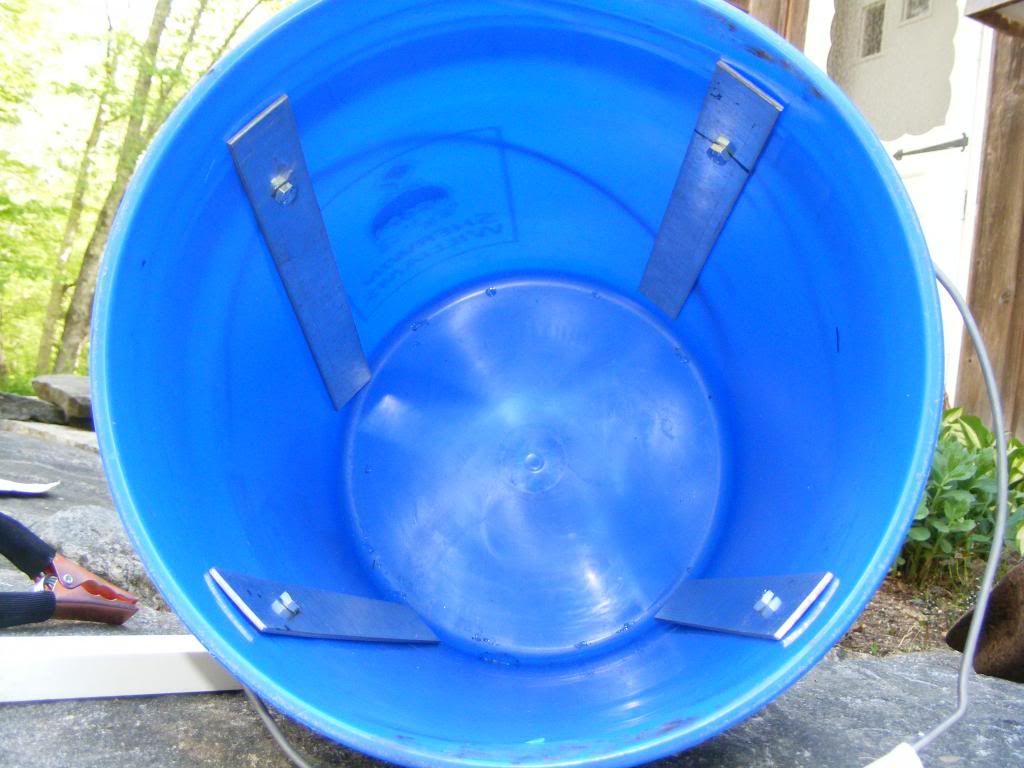
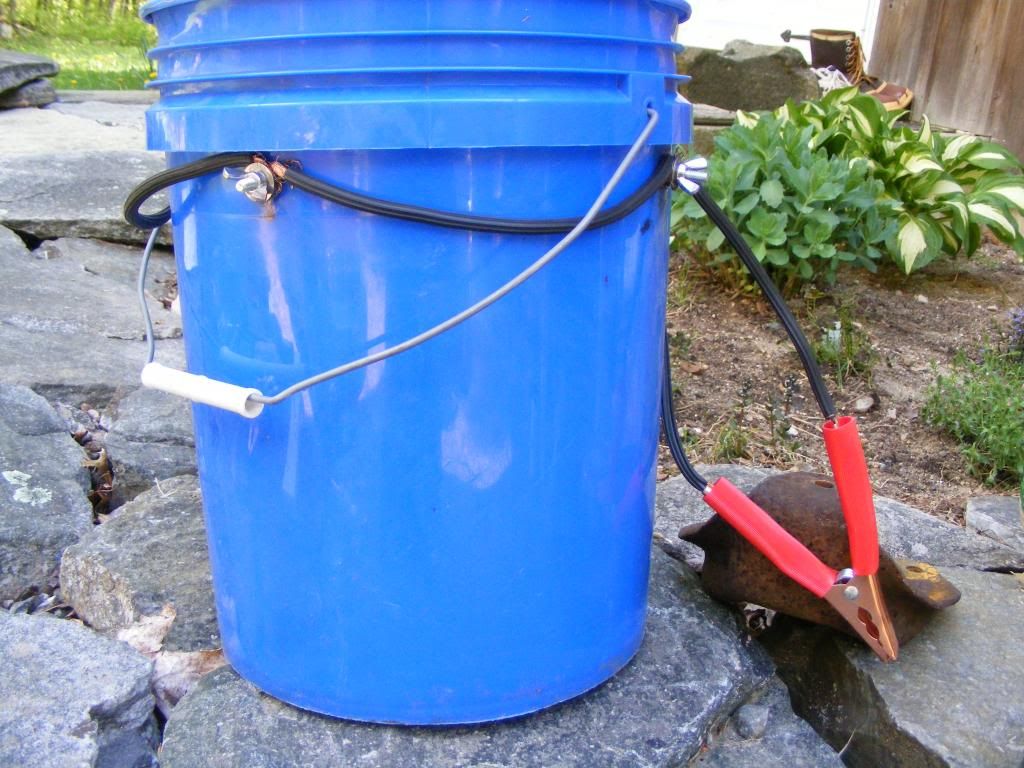
    The pieces of sacrificial steel are bolted to the bucket. This process works on "line of sight". That is, if the rust can't "see" an anode, it will not be de-rusted as well as it would be if it could.


    I used an old jumper cable to connect the four pieces of sacrificial steel.


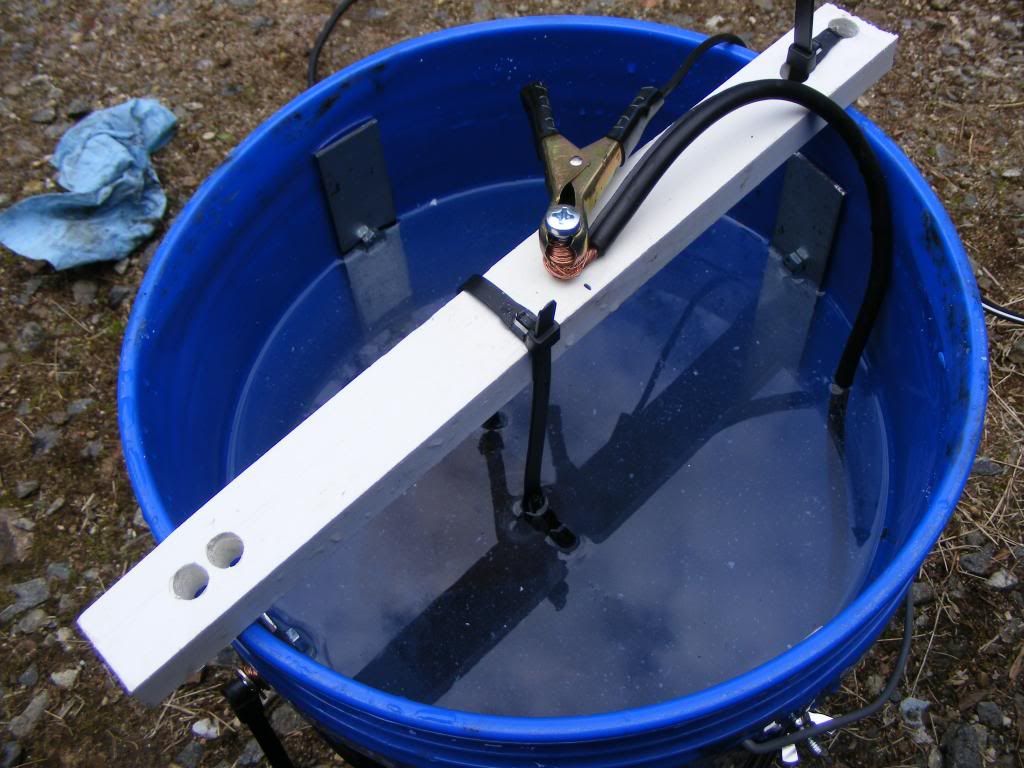
    Suspend the part to be de-rusted in the bucket, so that it does not touch any of the anodes. Releasable zipties work great for this purpose. Fill the bucket with water and add 1 tablespoon of A&H washing soda PER GALLON of water.


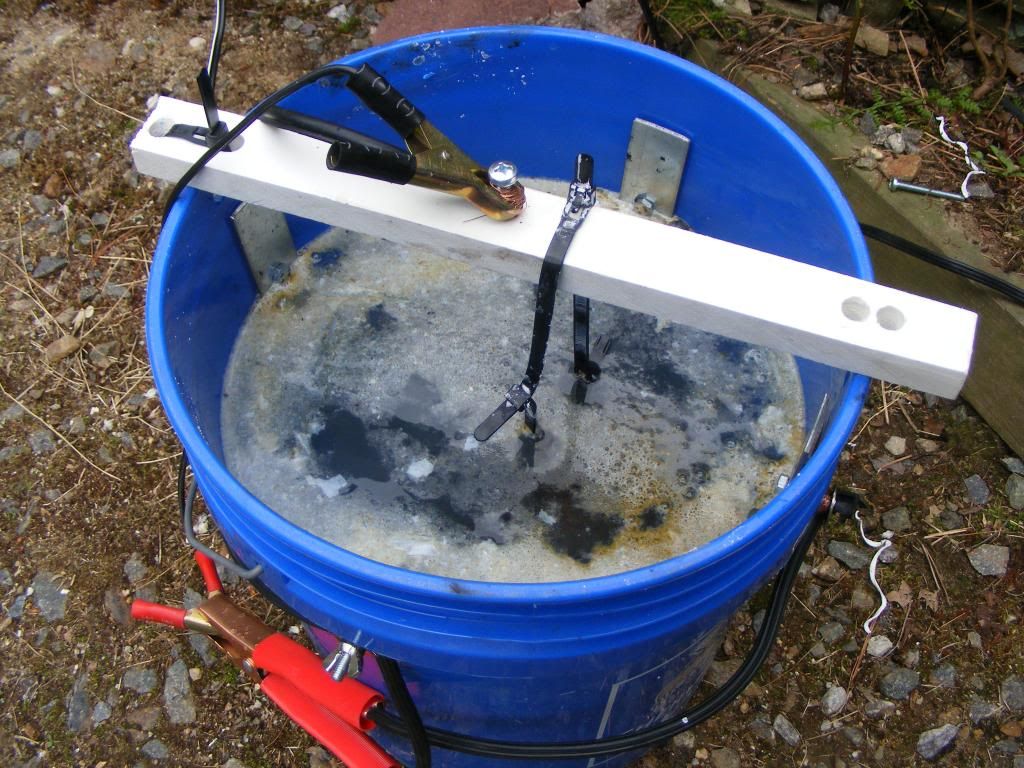
    Then, you will connect the NEGATIVE lead of the battery charger to the part to be de-rusted. It may be a good idea to connect the lead instead to a length of wire (see above picture), which is then connected to the part, so that the lead is not submerged in the solution. This will ensure that the battery charger clips aren't damaged. The POSITIVE lead will be connected to the anodes. Turn the battery charger on, and after a while, you will see rusty foam forming at the surface.


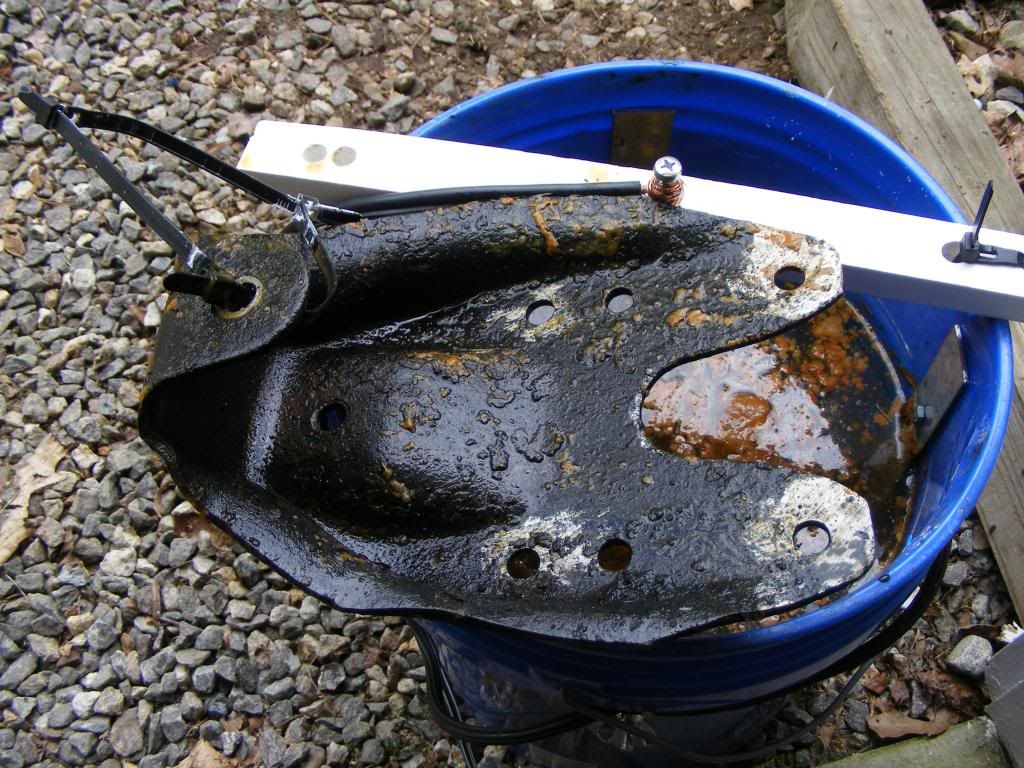
    After three-ish hours.


    The part comes out looking like this.


    Take a wire wheel to it for a few minutes, and see the difference.

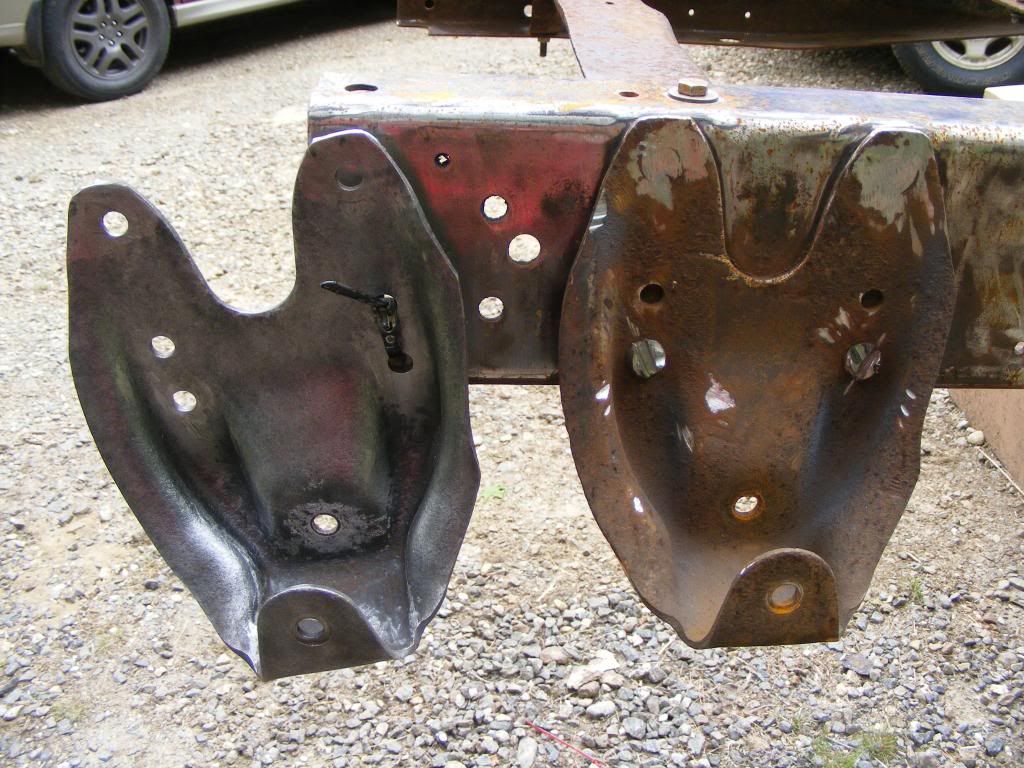
    Clean.


    You may ask...well, can't you do the same thing with just a wire wheel/flappy disc? NOPE. Those are great tools, but it is not possible to remove rust with them without removing some of the surrounding metal. Not to mention the fact that some crevices are impossible to get to with these types of tools. See the difference on this cross member. The ends were treated with electrolysis, then hit with a wire cup brush on an angle grinder. The middle was only de-rusted with the grinder.

    ...woops, I don't have this image right now...I'll have to get it off my camera... coming soon!
    Last edited by TIMMAY!!!; 05-28-2014 at 07:08 PM.
    Please leave your comments in the box outside my door, right underneath the sign that reads: Shame T. Llama, phD. Your thoughts are very important to me!

  3. Back To Top    #33
    Team Knuckledragger papacueball's Avatar
    Real Name
    Jason
    Location
    Louisiana
    Vehicle
    2011 Dodge Charger
    Posts
    719
    Join Date
    Feb 2013

    Re: The Victim Build Thread -- Featuring frame replacement

    That's pretty cool, Tim. Now you just need a bucket big enough to put the whole frame in!

  4. Back To Top    #34
    RRAMA NEED $$ TIMMAY!!!'s Avatar
    Real Name
    Tim
    Location
    CT
    Vehicle
    1993 Dodge Dakota, 2003 Subaru Outback
    Posts
    309
    Join Date
    Apr 2013

    Re: The Victim Build Thread -- Featuring frame replacement

    Friends and I were joking about putting it in a swimming pool. Then we thought...why not have electrolysis parties?! Dump a whole bunch of rusty crap into a big concrete pool, then drink beer and let it do its thing! Probably would need a slightly bigger charger...
    Please leave your comments in the box outside my door, right underneath the sign that reads: Shame T. Llama, phD. Your thoughts are very important to me!

  5. Back To Top    #35
    Big Daddy chad's Avatar
    Real Name
    Chad, among other colorful phrases.
    Location
    East-Central Illinois
    Vehicle
    2004 Civic Si
    Posts
    1,182
    Join Date
    Mar 2013

    Re: The Victim Build Thread -- Featuring frame replacement

    I'll bring the bigger charger......

    That's pretty damn cool.

  6. Back To Top    #36

    Re: The Victim Build Thread -- Featuring frame replacement

    Fuckin' impressive... Love it :thumbsup:

    Kelvin

  7. Back To Top    #37

    Re: The Victim Build Thread -- Featuring frame replacement

    Those plastic kiddie pools work good for larger parts or a wood frame and a roll of that heavy black plastic for the really big stuff. PH plus for swimming pools is the same as the washing soda and generally easier to find and make sure you use one of the older style battery chargers, the newer smart chargers won't charge unless they see voltage from a battery.

  8. Back To Top    #38

    Re: The Victim Build Thread -- Featuring frame replacement

    Any chance of harming the charger?

  9. Back To Top    #39
    Big Daddy chad's Avatar
    Real Name
    Chad, among other colorful phrases.
    Location
    East-Central Illinois
    Vehicle
    2004 Civic Si
    Posts
    1,182
    Join Date
    Mar 2013

    Re: The Victim Build Thread -- Featuring frame replacement

    current is really low I'd assume.

  10. Back To Top    #40

    Re: The Victim Build Thread -- Featuring frame replacement

    A lot of people use those old 10a chargers and usually report about 3-4a of current draw.

Posting Permissions

  • You may not post new threads
  • You may not post replies
  • You may not post attachments
  • You may not edit your posts
  •  
Back To Top